Fan Powered Toy Car
Includes the STEP CAD file.
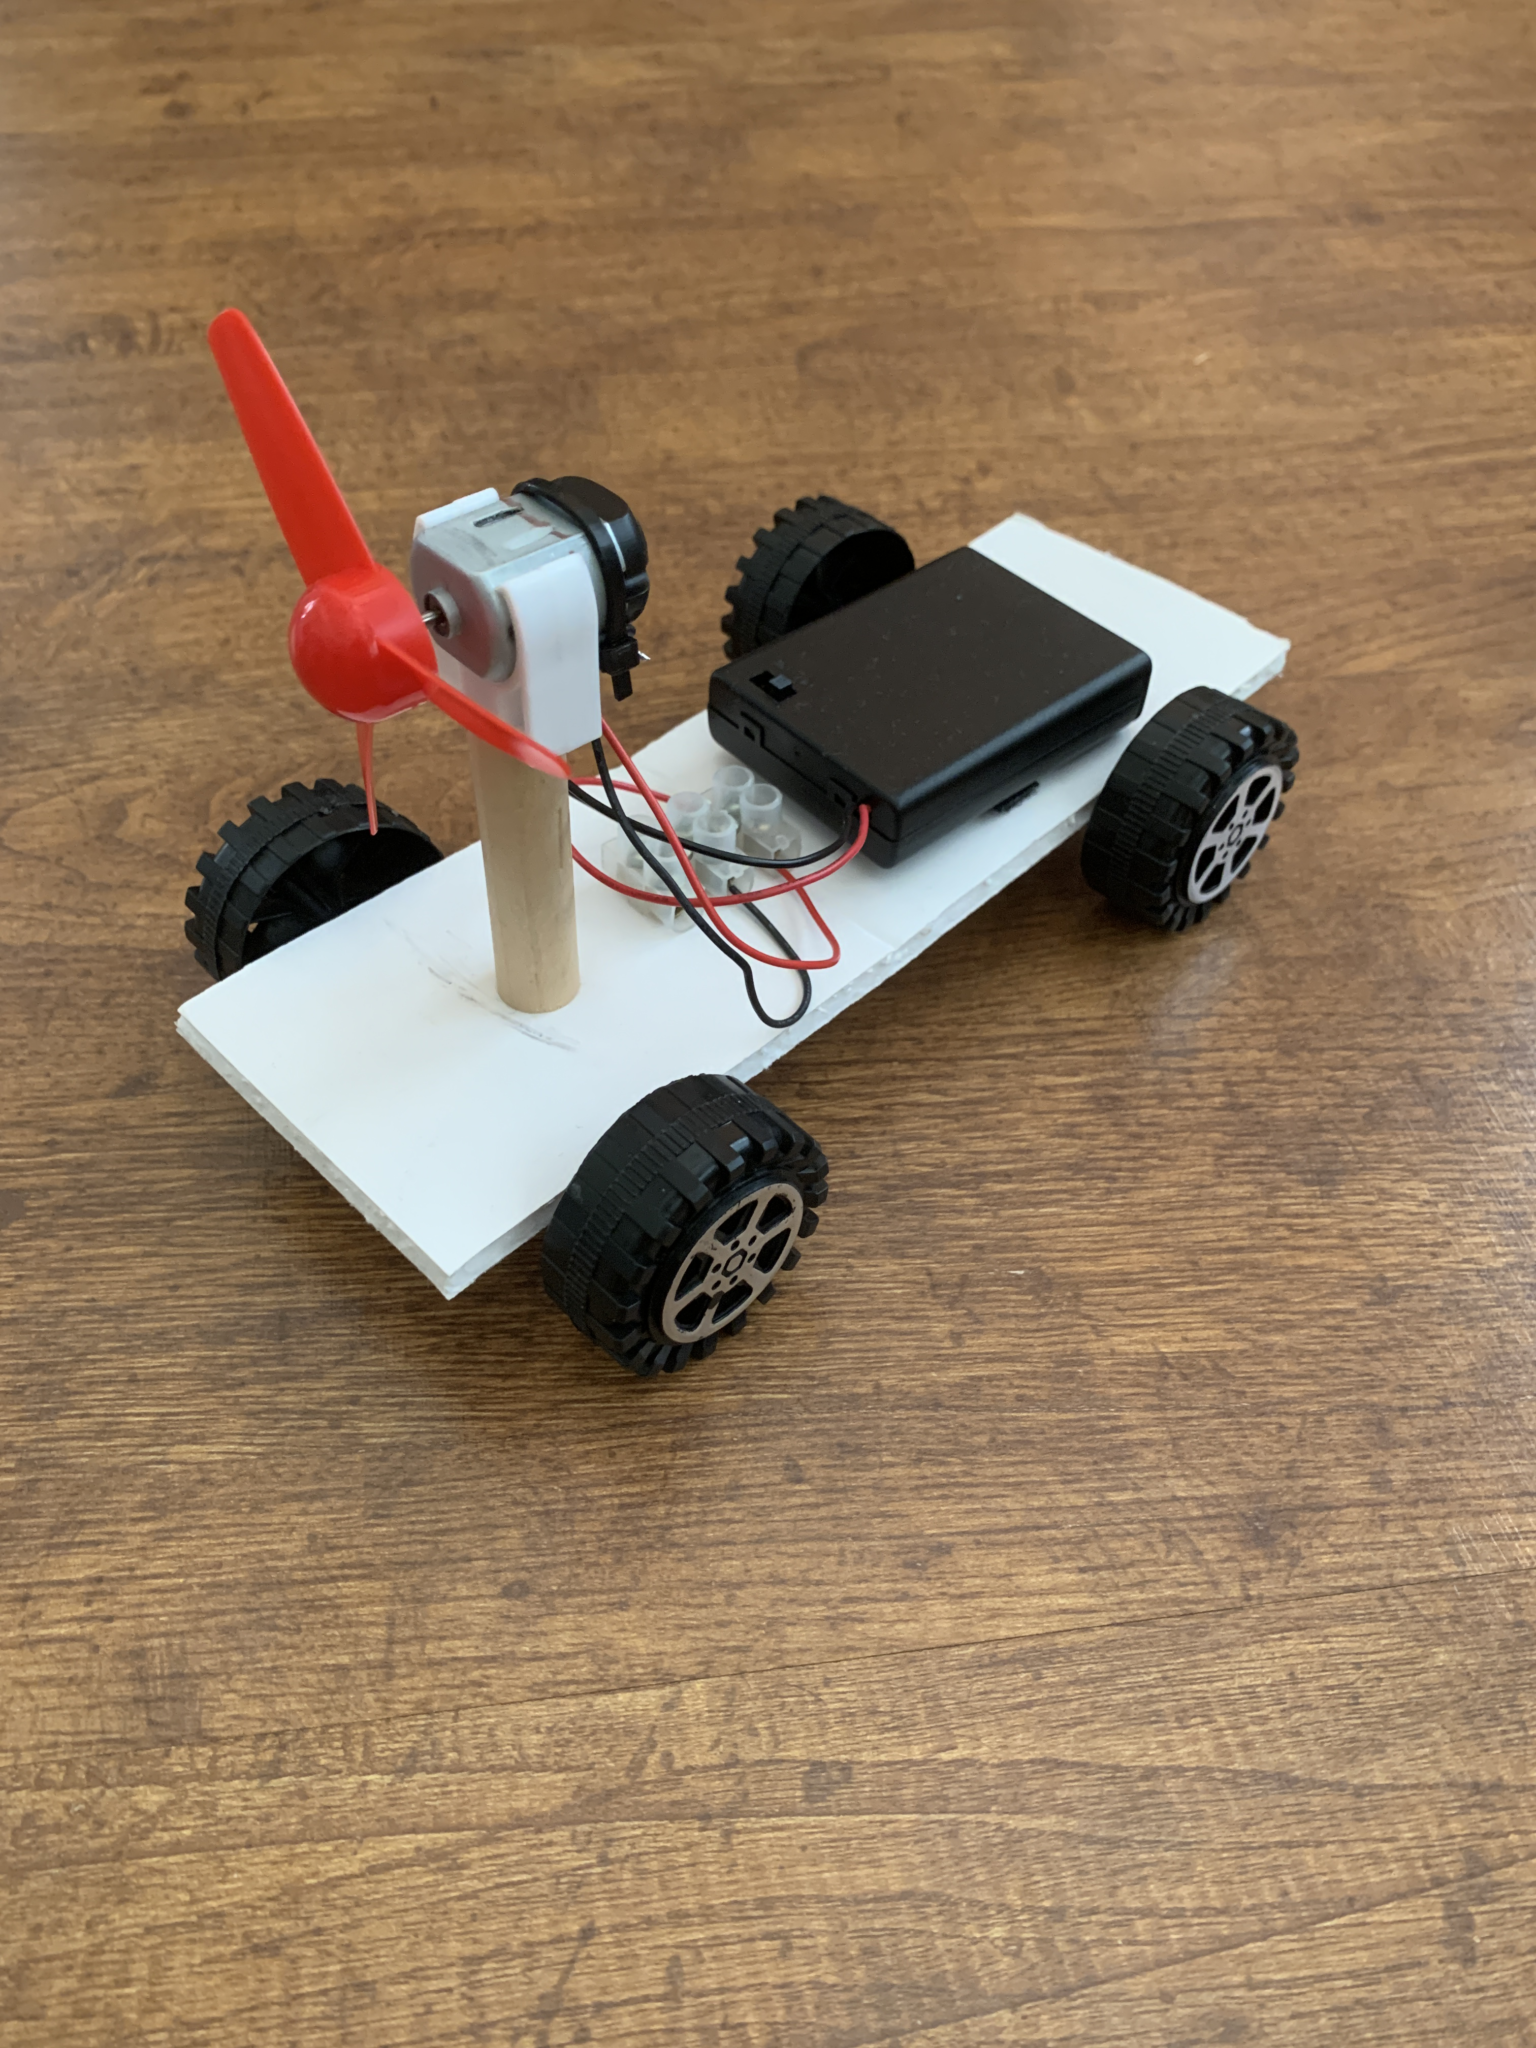
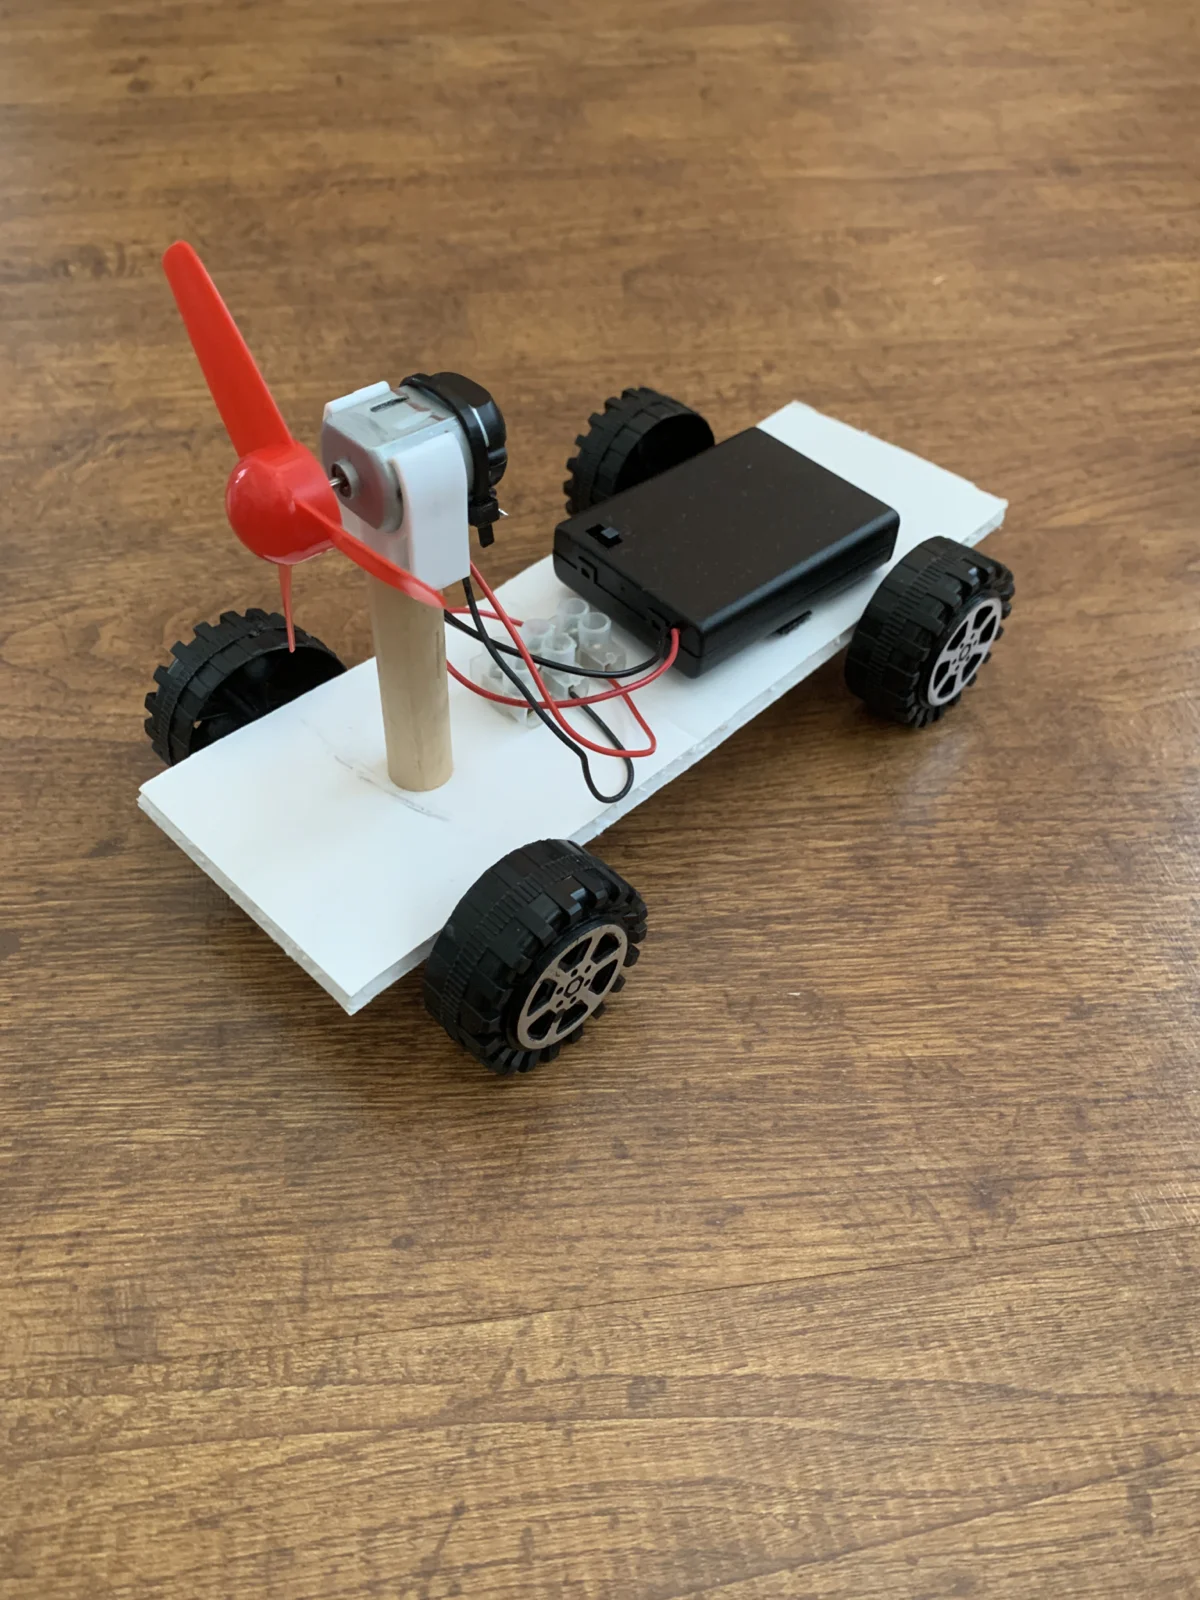
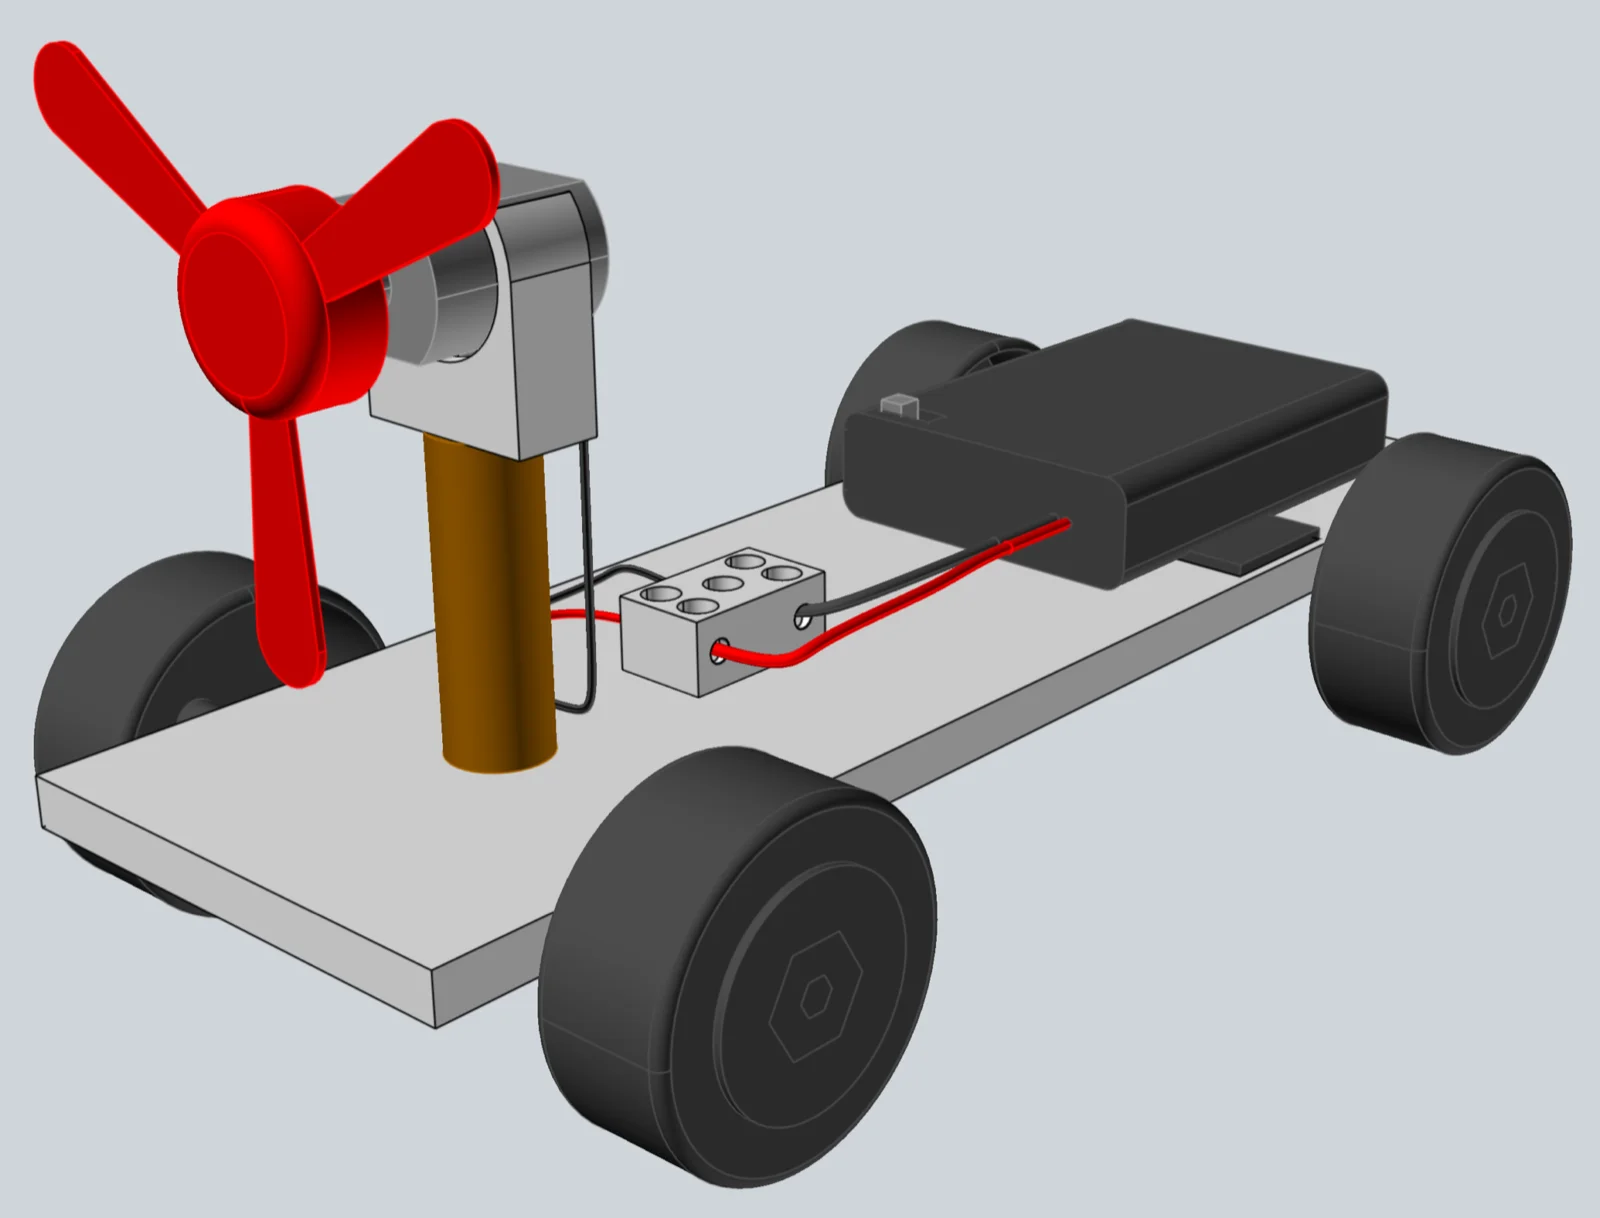
A foam-board fan-powered toy car built with a DC motor/wheel/fan kit — a hands-on electricity project for kids covering motors, batteries, and switches. Free 3D CAD files available.
I really enjoy stimulating my grandchildren’s curiosity while providing a teaching moment or two. This fan-powered car serves as a practical, hands-on way to understand circuits and basic electrical principles.
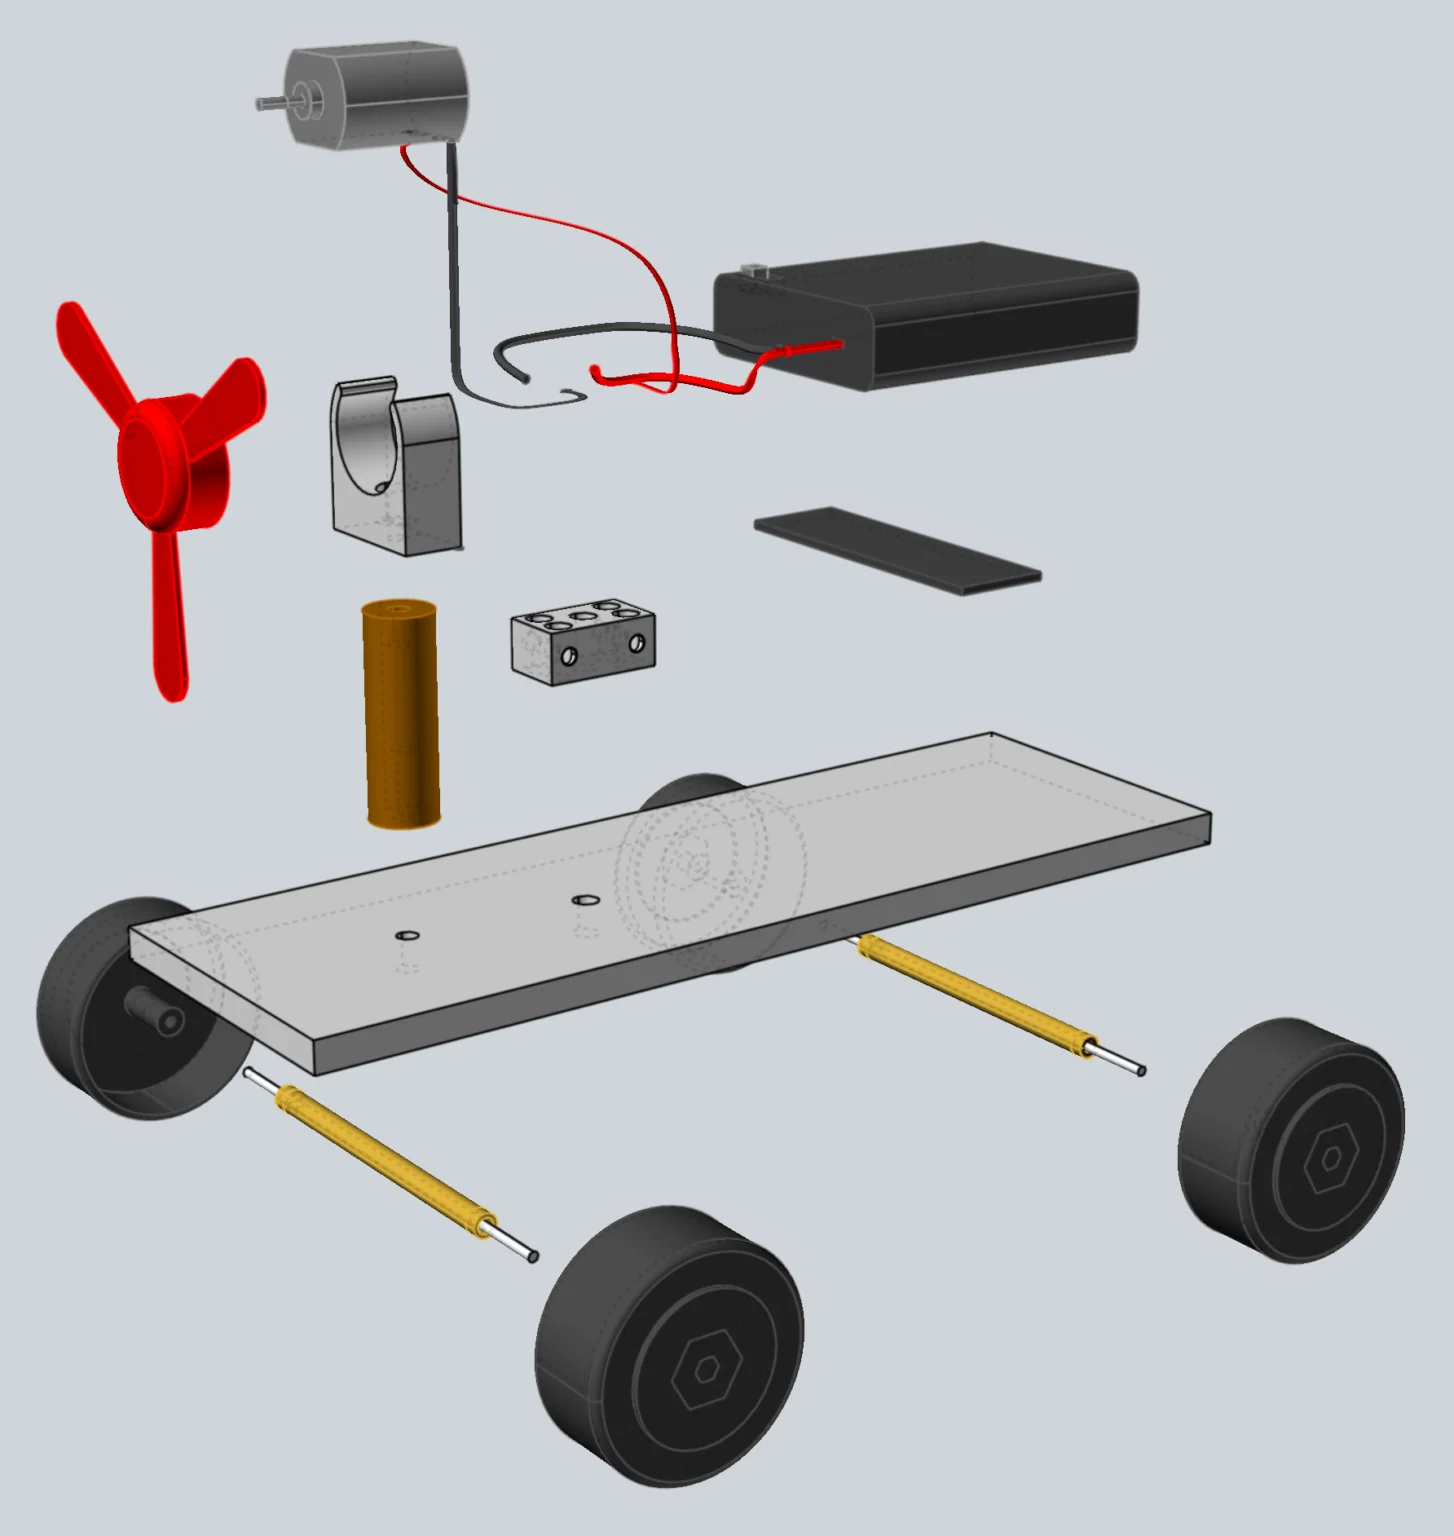
I sourced the components from EUDAX kits purchased via Amazon, including small DC motors, motor mounts, axles, wheels, fan blades, switches, battery cases, and quite a few additional parts. I upgraded to larger 1.6″ diameter wheels for improved performance.
I pre-assembled the motor components to maximize hands-on engagement while minimizing tedious fabrication. I really wanted the grandchildren to have fun while experimenting with the car and not get bored with parts fabrication.
Learning Opportunities
This project offers plenty of teaching moments: measuring, understanding parallel axle alignment, experimenting with battery quantity and fan speed correlation, reverse polarity effects, different fan blade types, pushing versus pulling configurations, and directional control through fan positioning.
Supplies
Materials & Hardware
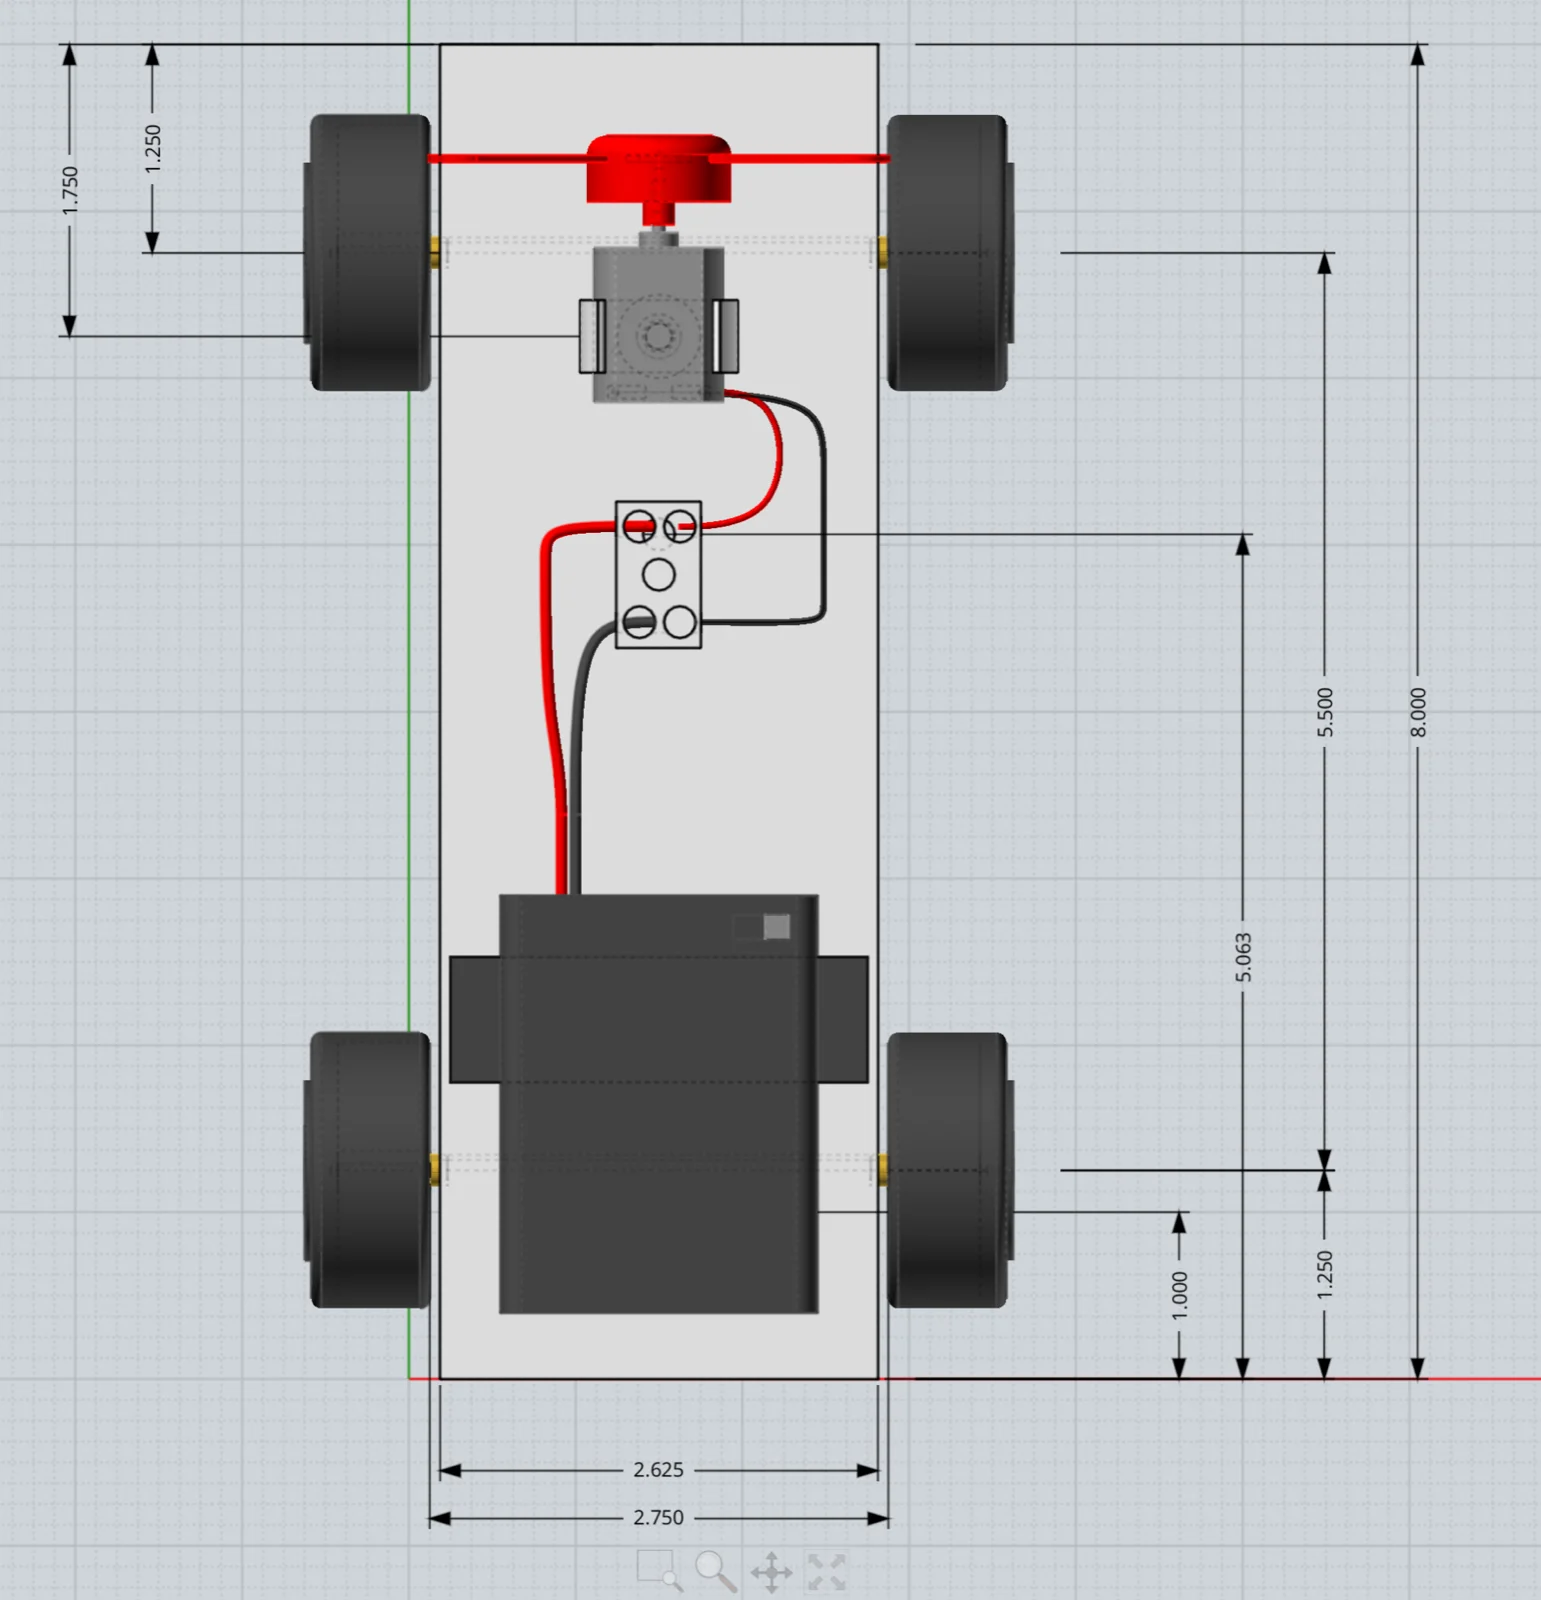
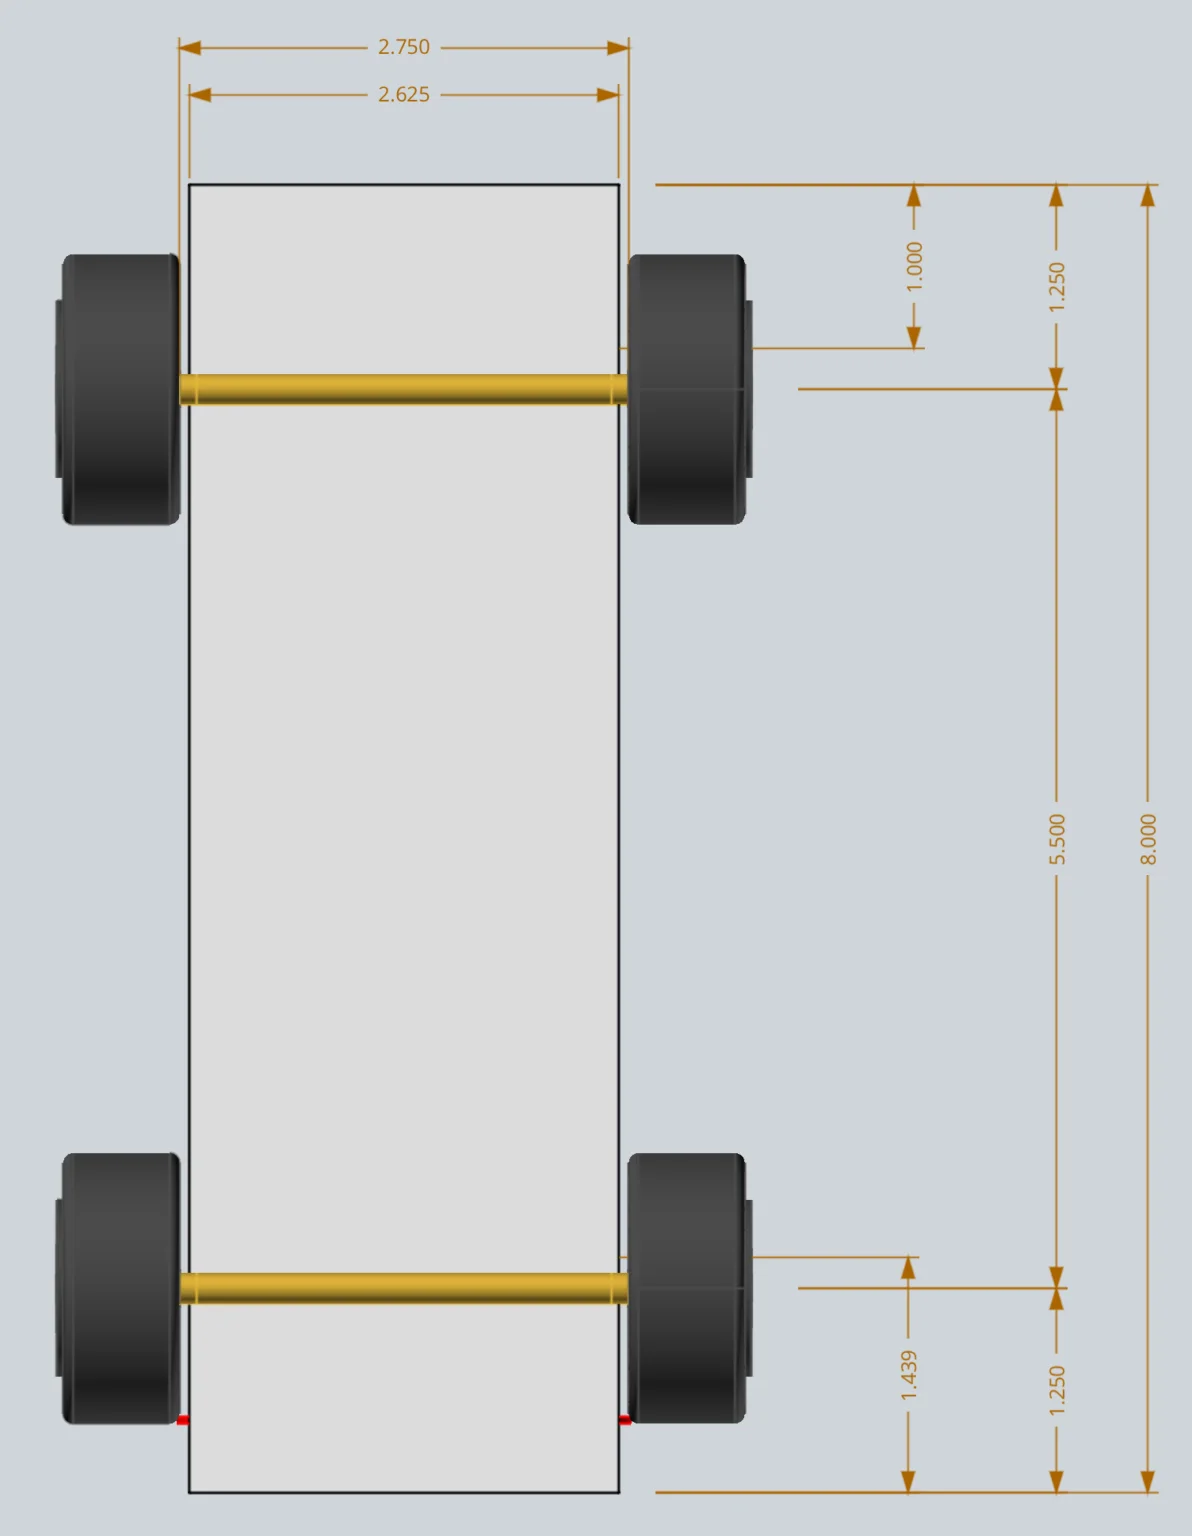
- 1/4″ thick foam board (chassis, 2 5/8″ width)
- DC motor, motor mount, axles, wheels (1.6″ diameter), and fan blades — EUDAX kit parts
- Switch and battery case, modified to accommodate up to 4 AAA batteries (for flexible voltage experimentation)
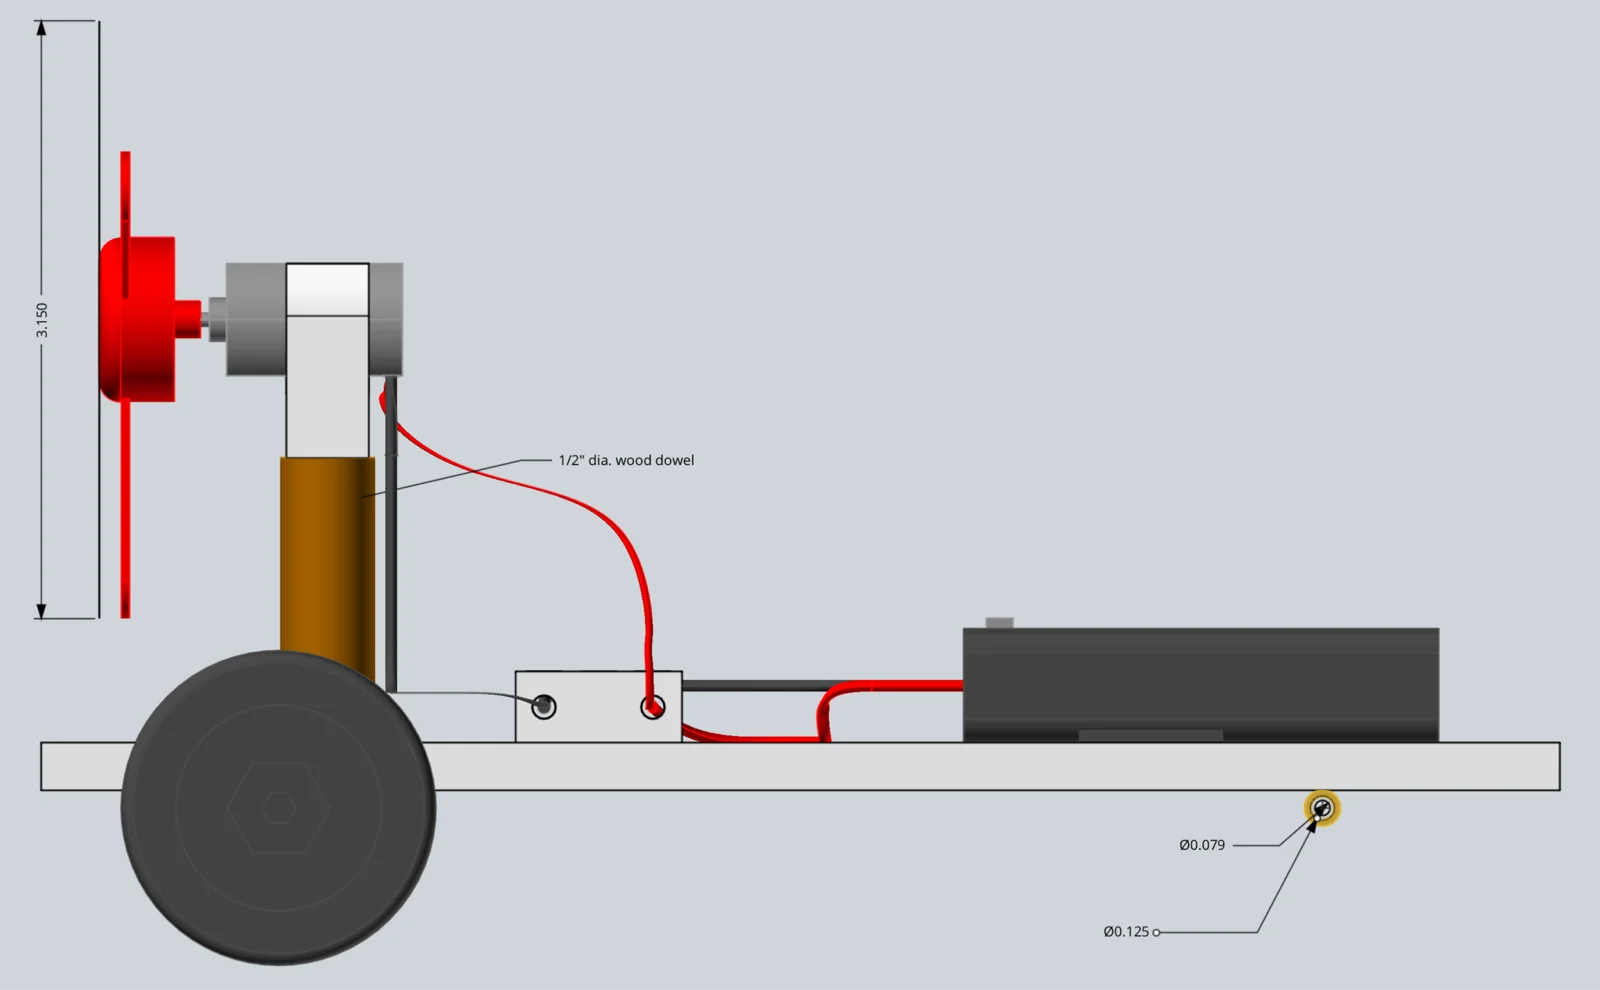
- 1/8″ diameter metal tubing (axle bearing supports)
- Wooden dowel (motor mount support)
- Terminal block (or any simple wire connection)
Tools
- Craft knife or scissors (foam board)
- Hot glue gun
- Screwdriver
Pulled from the build notes below — quantities weren’t specified in the original write-up.
Steps
- Measure and cut out the 1/4″ thick foam board chassis.
- Hot glue the axle ‘bearing’ tubes onto the chassis bottom.
- Push one wheel onto each axle and slide the axle through the tube.
- Push the second wheel onto each axle, allowing a slight gap between the wheel and tube end.
- Screw the motor mount to the wooden dowel.
- Screw the motor mount to the chassis.
- Select a fan and carefully push the fan onto the motor shaft.
- Insert the motor into the motor mount.
- Connect the motor wires to the battery pack. I used a terminal block, but any simple wire connection works.
- Insert the batteries and start experimenting!
Image Gallery