Make a mechanical pinball machine complete with a fully functional shooter, flippers, marble-dispensing targets, and scoreboard! The pinball machine is scaled to simulate an actual pinball game using common 5/8″ balls versus the 1 1/16″ diameter balls used for a full sized pinball machine. Checkout the short video to see some actual gaming action.
This project started as a trial-and-error prototype that I played with my grandchildren. Initially I used pegboard material for the playing field plus removable 1/4″ diameter wooden dowels to facilitate easy changes to the field layout and corresponding game action.
As you can see from the photograph, the project evolved into a permanent field layout but still has the original pegboard surface (with lots of plugged holes). If I was building another one, I’d definitely replace the pegboard with a solid piece of plywood.
Setup and Scoring
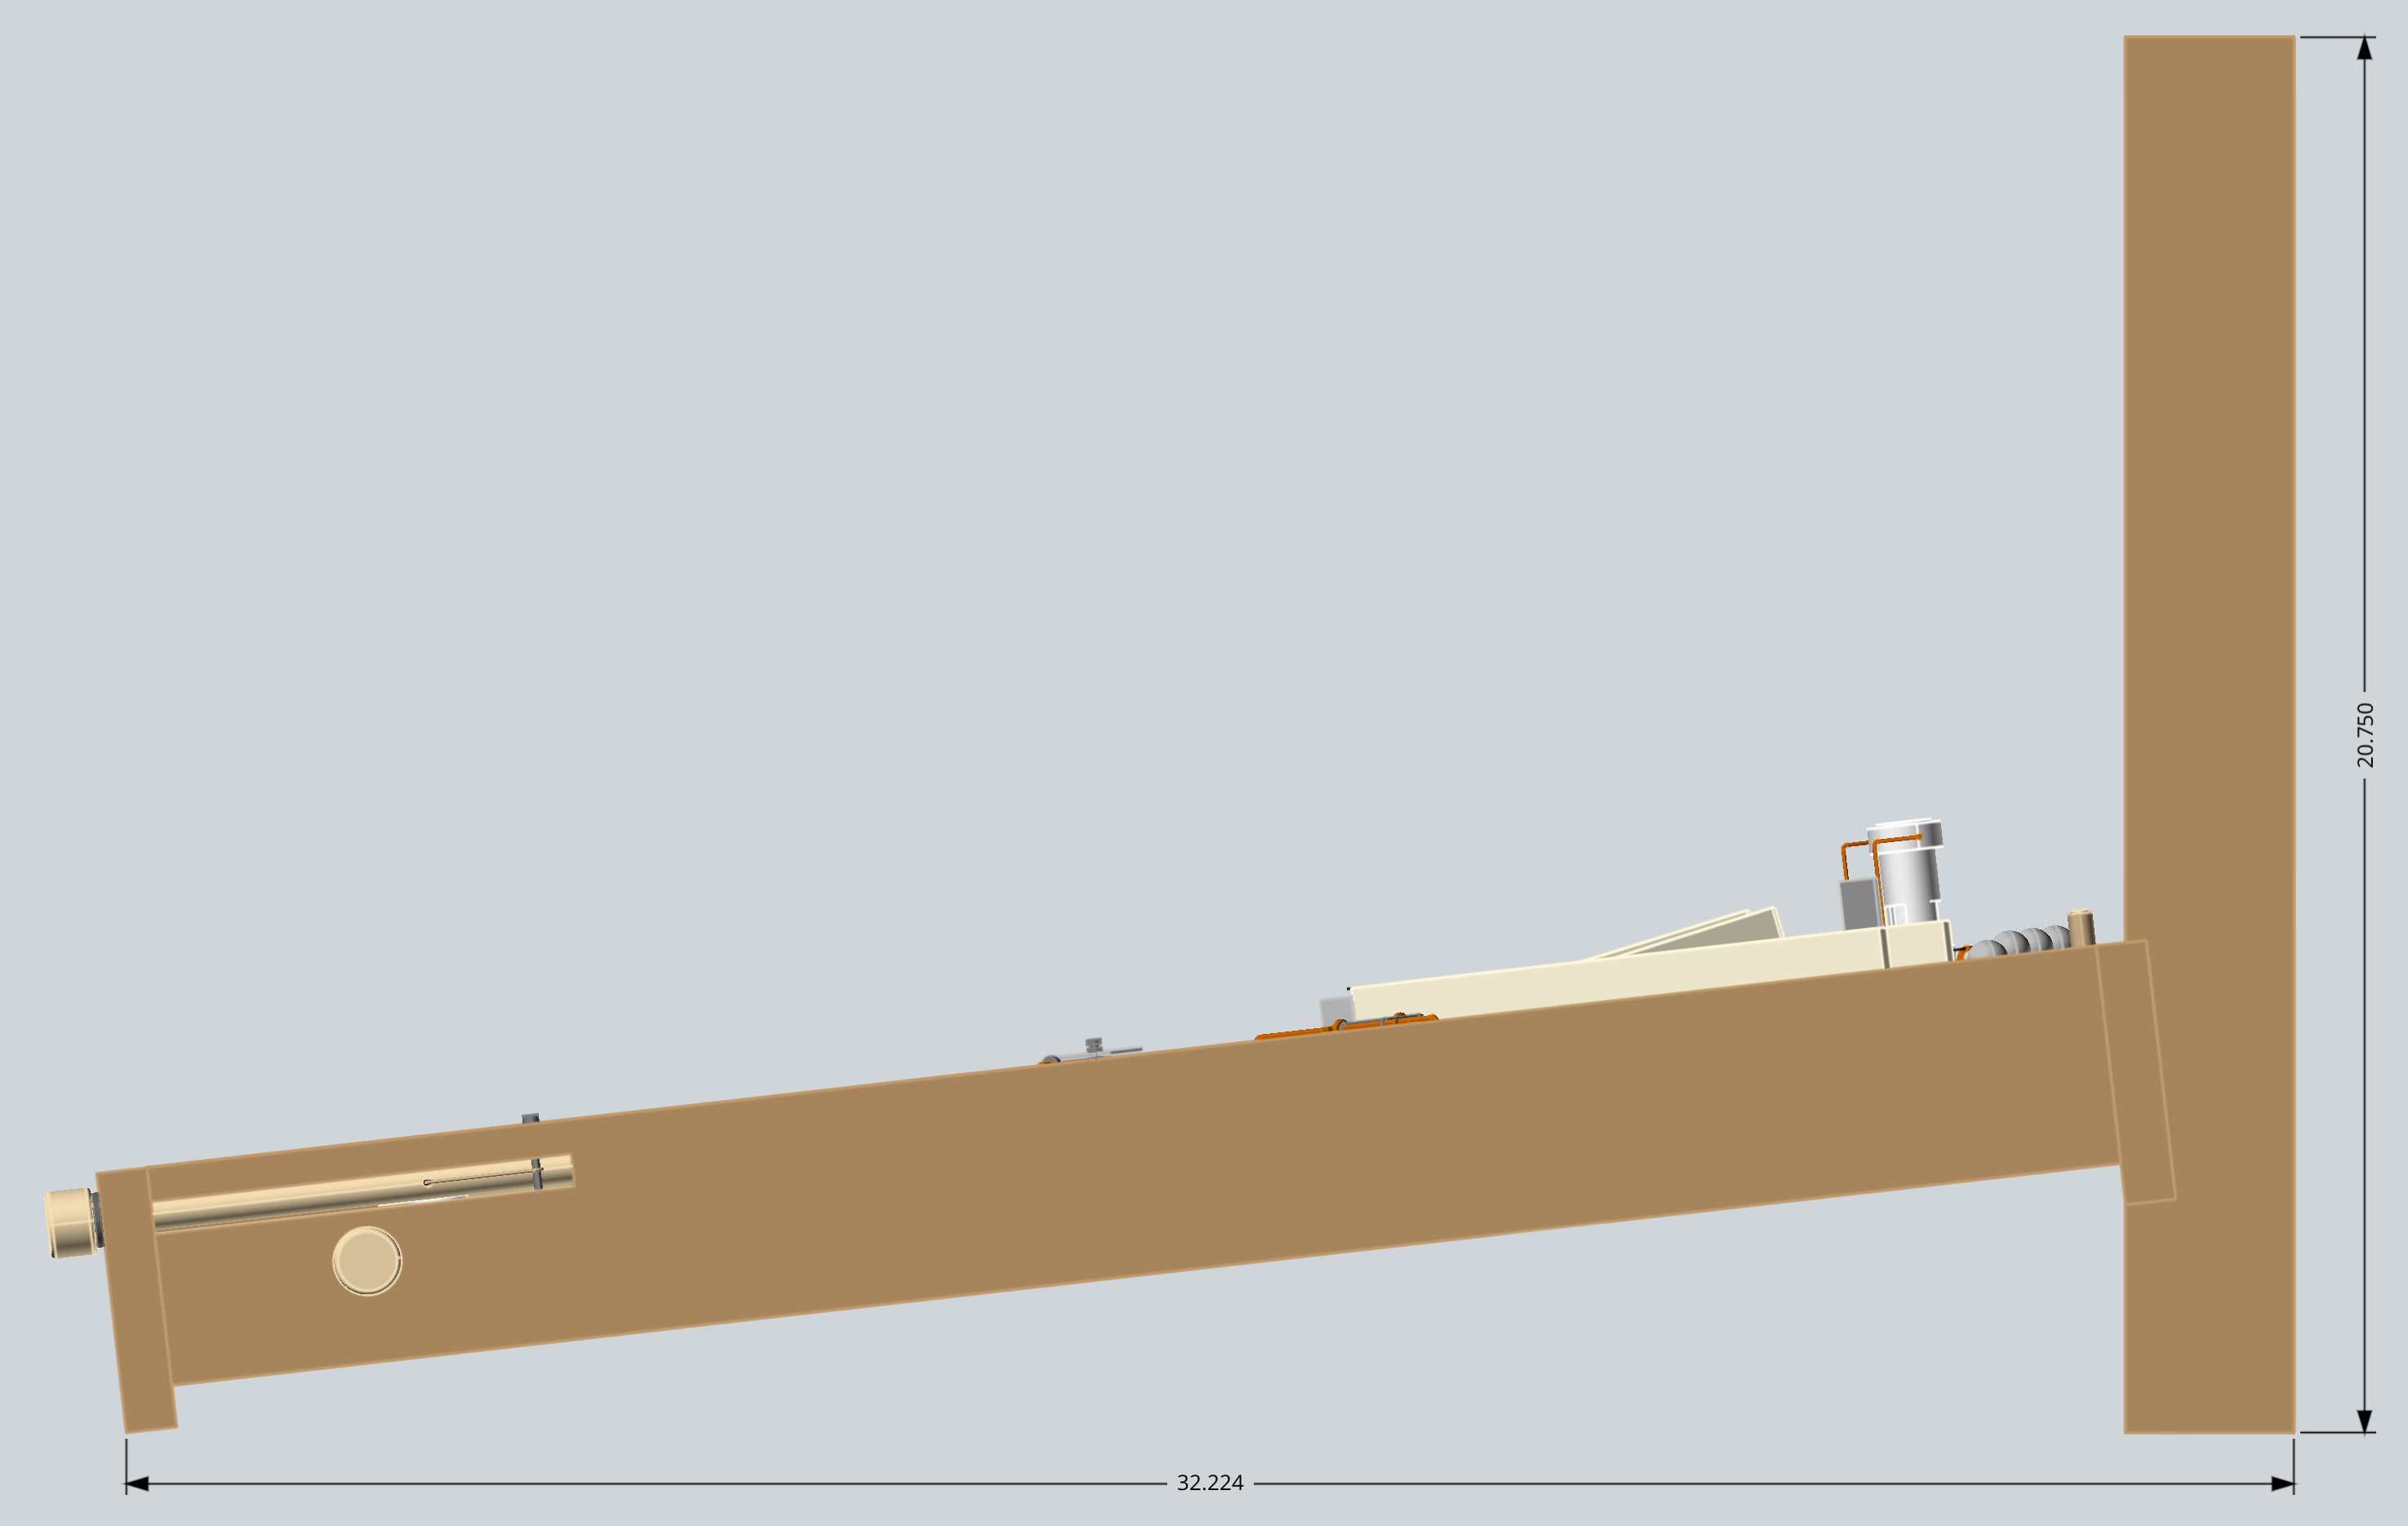
I wanted the pinball machine to be portable and easily stored, so I made the back scoreboard removable using two thumbscrews. To assemble, simply set the back edge of the playing field onto the scoreboard assembly and tighten the two thumbscrews. Insert the flipper push rods, add balls, zero the scoreboard and you’re ready to play.
My grandchildren are competitive and enjoy winning. So I decided we needed way to keep score. My solution was bonus balls dispensed by hitting the various targets on the playing field. My grandchildren also like to place a ball in each of the ‘rollover’ lanes near the top. Players can determine in advance the number of ‘shooter’ balls per game each player is allowed.
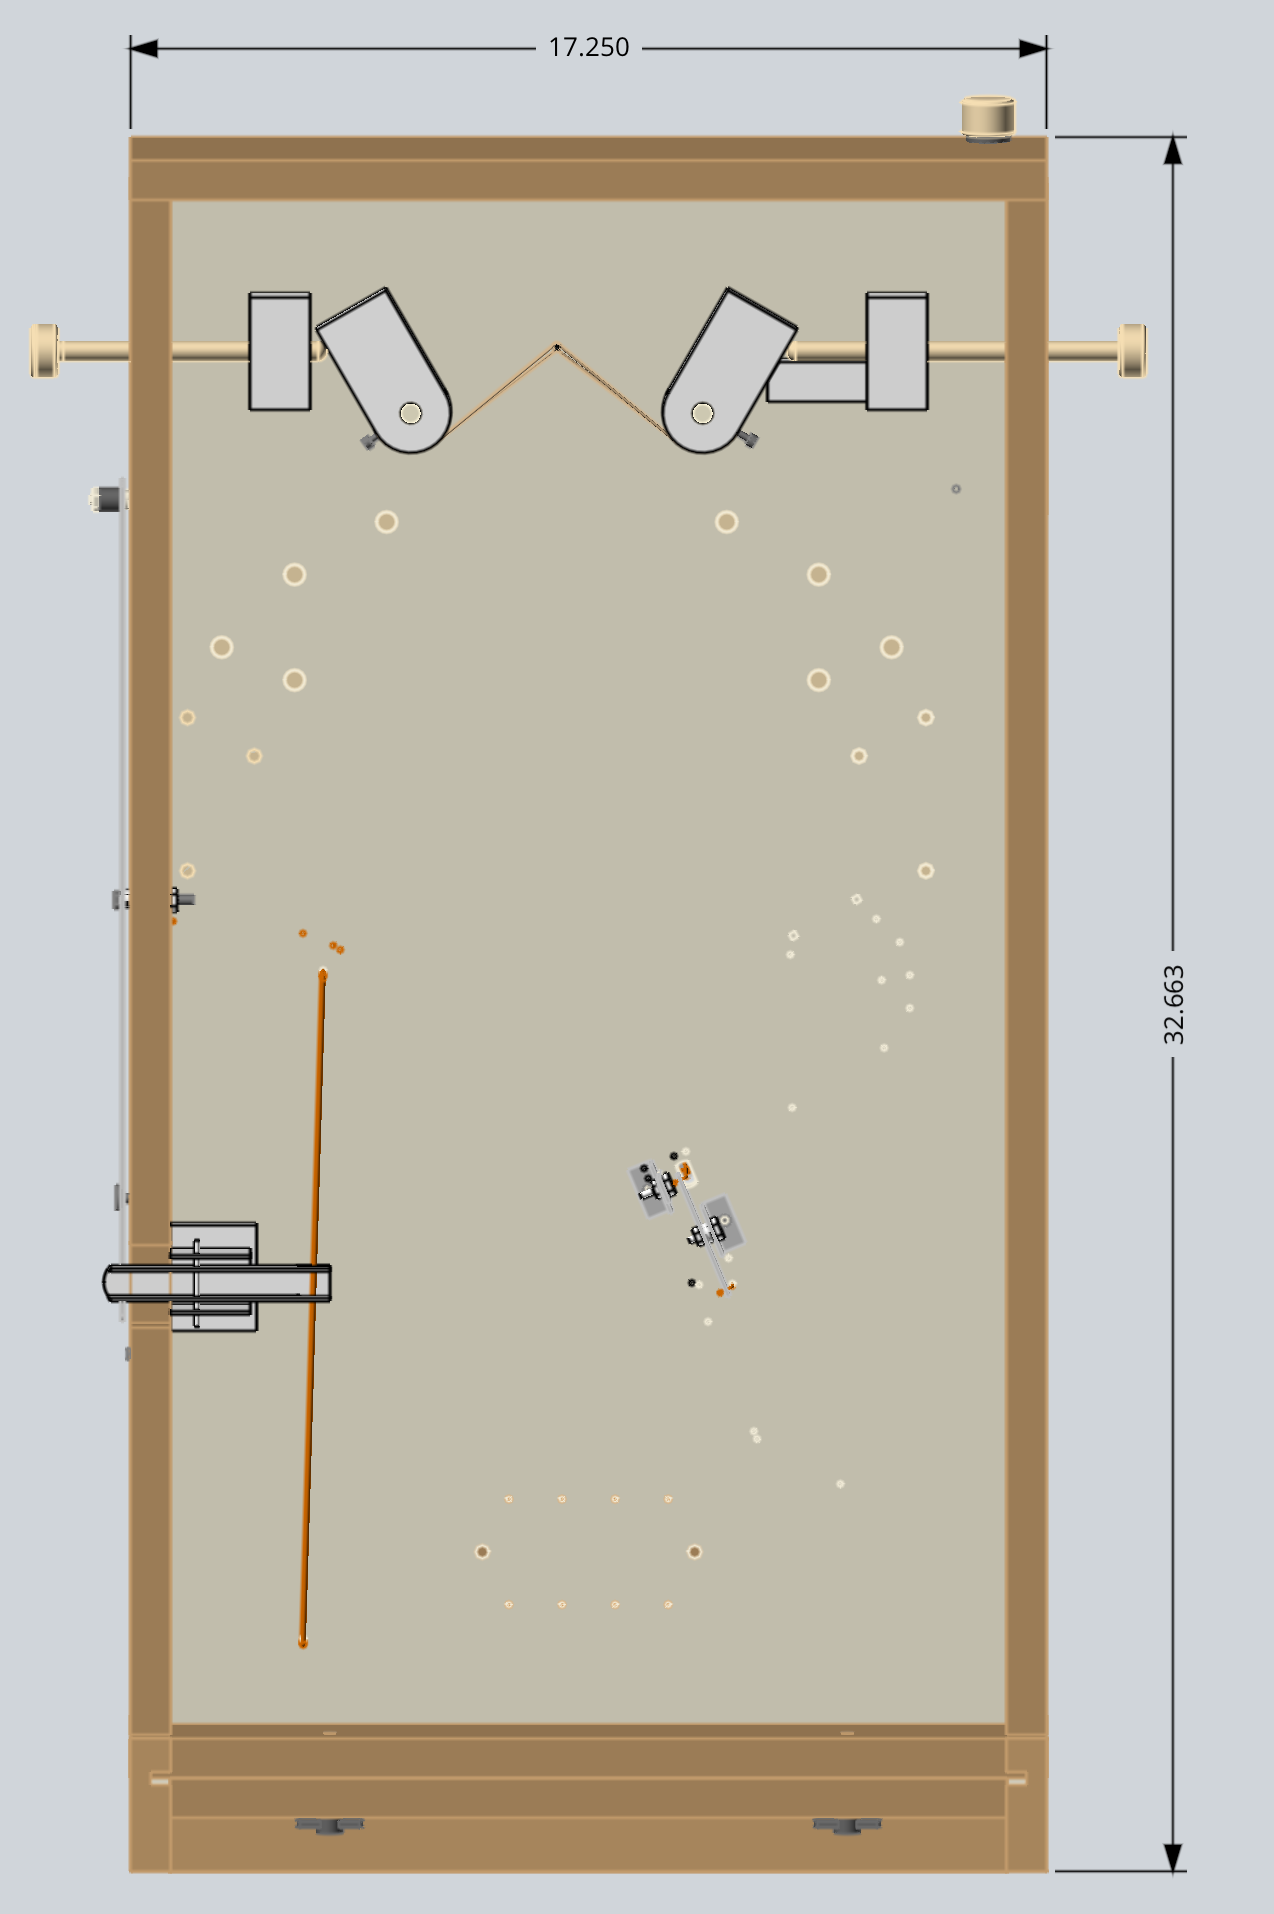
The playing field has four targets containing bonus balls.
- Pocket hole target
- Located at middle left side.
- Score by capturing the shooter ball in the pocket. Then manually flip the left side lever bar to manually release a bonus ball from the top left corner and also eject the shooter ball from the pocket.
- Ramp jump target
- Located at the top left corner.
- Score by flipping a ball up the left ramp hard enough to jump the gap and hit the target. The target face plate pivots back and pushes a ball out of the pcv tube.
- Spinner target
- Located in front of the right ramp.
- Score by flipping a ball through the spinner in front of the right ramp. A ball located on the left side of the right ramp is ejected when the spinner is rotated.
- Flip target
- Located at the middle right side.
- Score by flipping a ball hard enough to rotate the target face plate which ejects a bonus ball.
A turn ends when all of the shooter balls have been used. Count the ‘drained’ balls at the bottom end of the playing field and manually rotate the scoreboard wheels to record the score.
Make Your Own
I have provided the following downloadable files if you would like more design and construction details.
- Instructions (downloadable pdf file)
- Description
- Construction Tips
- Images
- Photographs
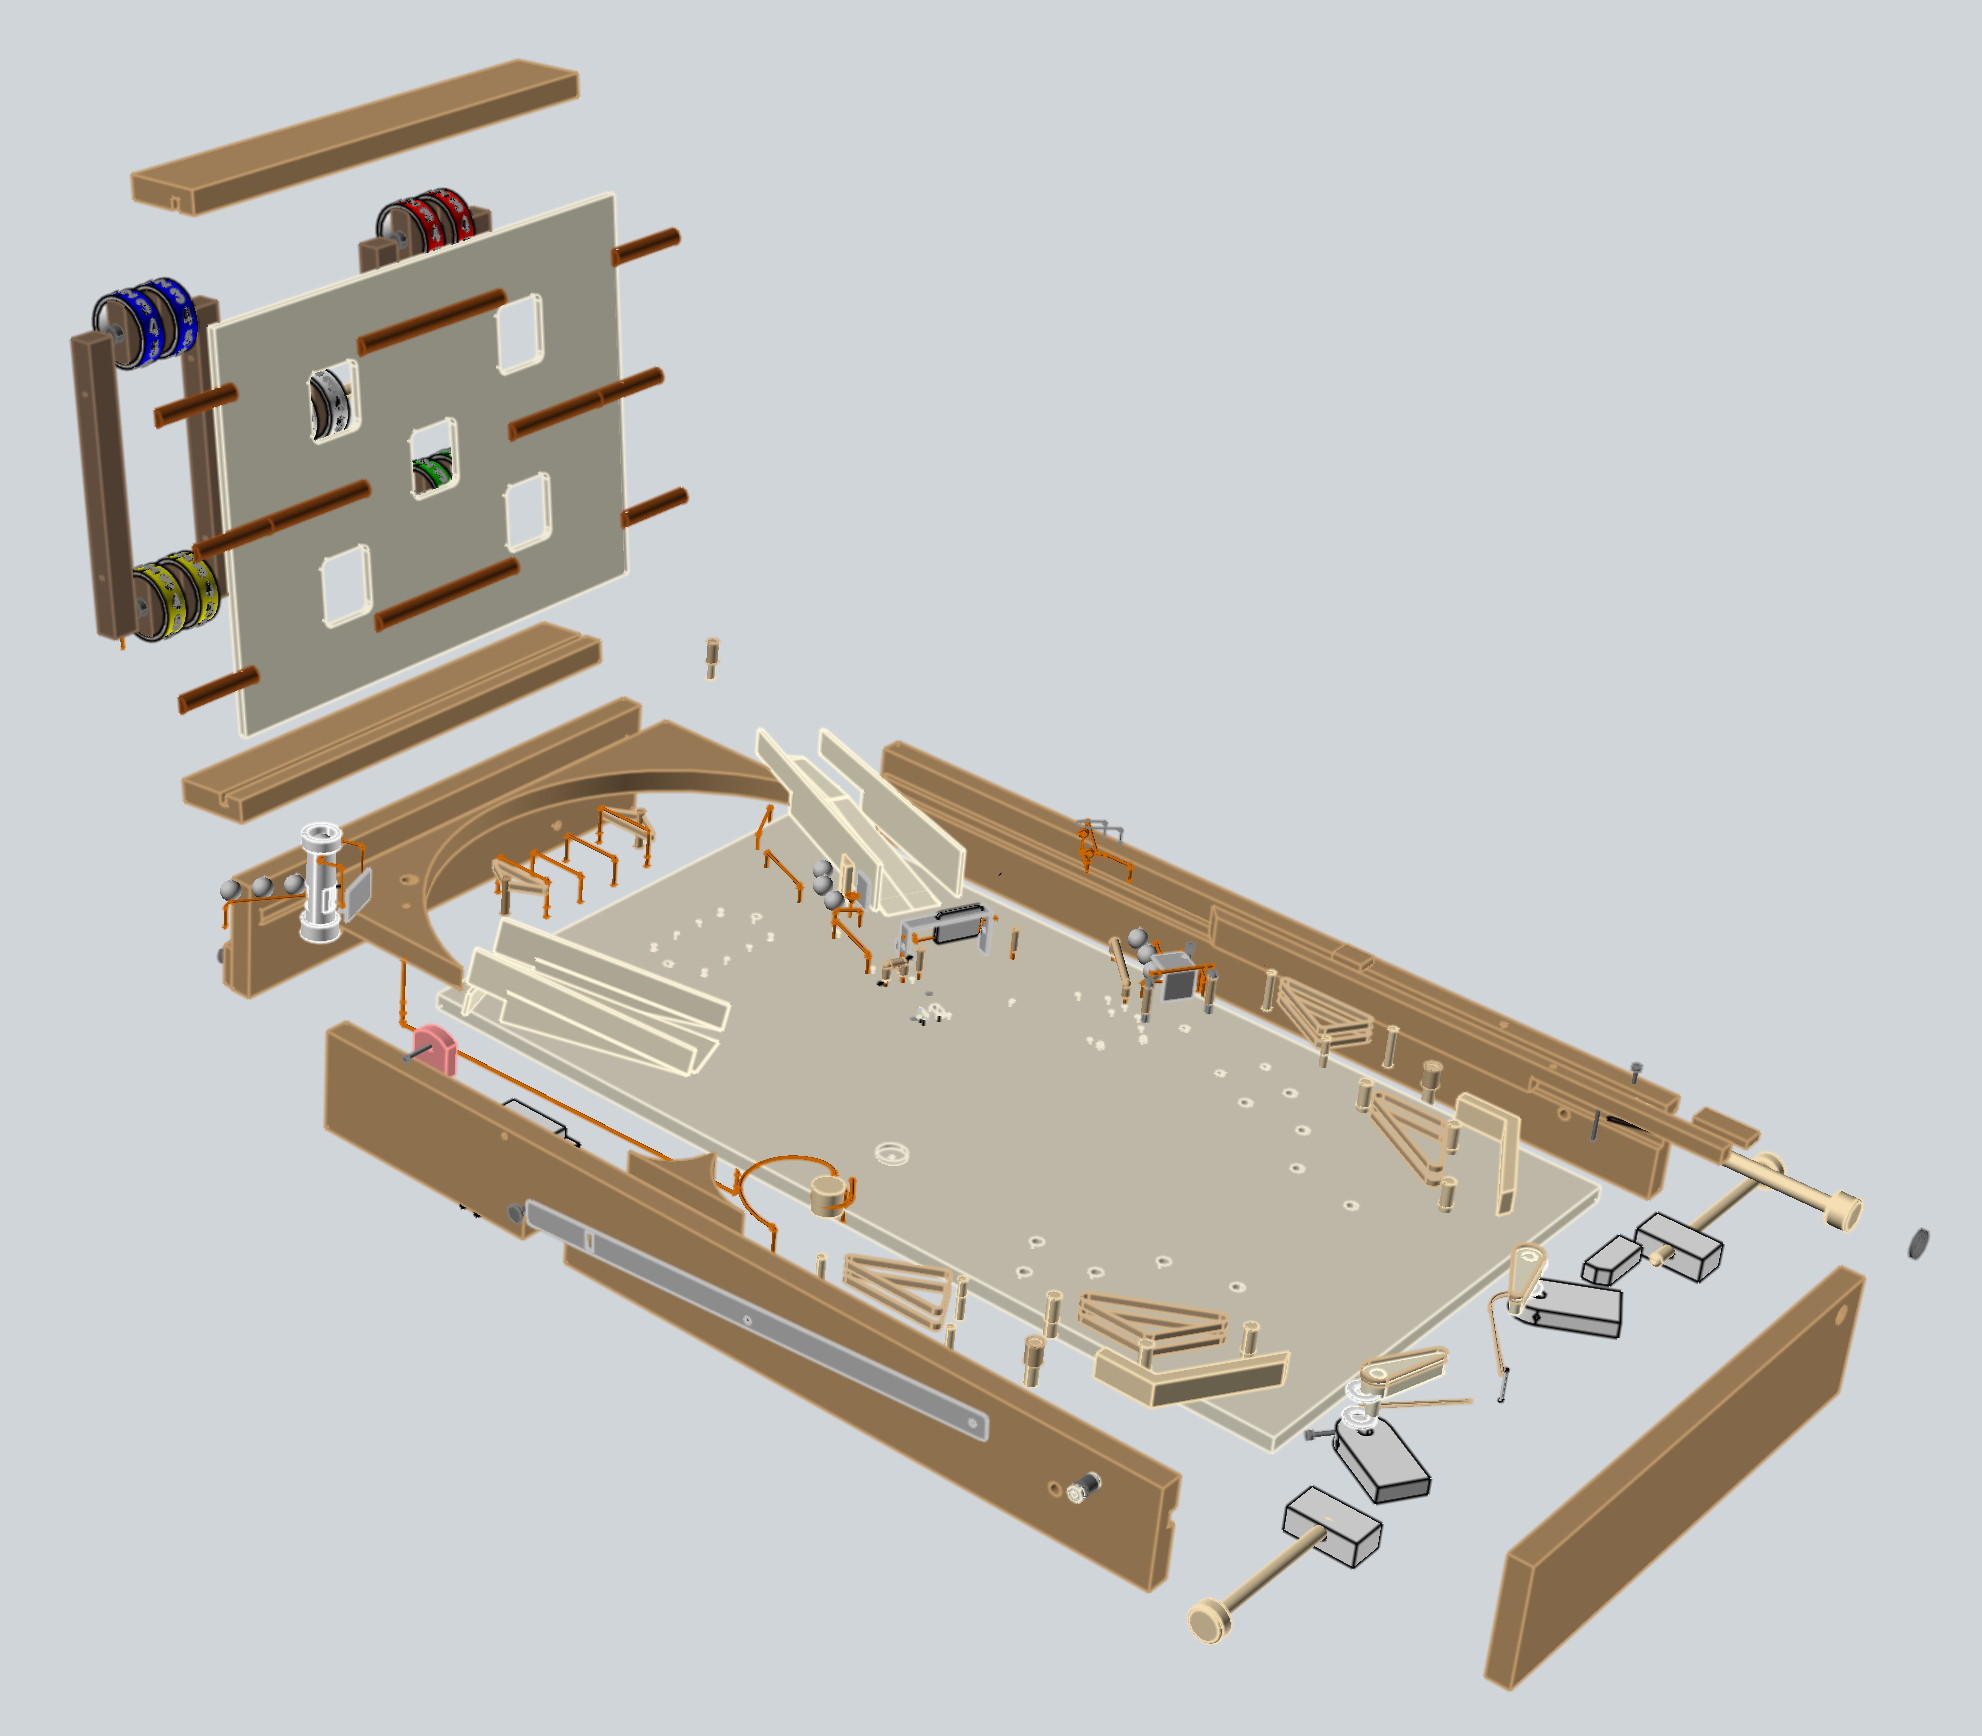
- 3D Model Screenshots
- 3D CAD Models (zip file)
- STEP file (.stp)
- SketchUp compatible file (.skp)
- MoI CAD file (.3dm)