Adult-Child Learning Project
I really enjoy stimulating my grandchildren’s curiosity while providing a teaching moment or two. I was exploring some basic electricity concepts with them using magnets, batteries, switches, LEDs, etc. But having an actual project always seems to capture their interest the best. So I decided a simple, fan-powered car might be an easy application for their newly gained electricity knowledge.
I had most of the basic parts in my workshop, but I still needed some inexpensive wheels, axles, DC motors, and fans. So I perused the internet and discovered an inexpensive parts kit made by EUDAX which I purchased from Amazon. The kit included small DC motors, motor mounts, axles, wheels, fan blades, switches, battery cases, and quite a few additional parts. But I really wanted larger diameter wheels for the project I had in mind. So I also purchased a second EUDAX kit containing larger 1.6″ diameter wheels plus mating axles.
Learning Opportunities
Here are a few learning opportunities I explored with the grandchildren. I’m sure you can and your kids can add to the list.
- Measuring
- Parallel versus non-parallel axles (accurate assembly)
- Fan speed versus number of batteries
- Fan spinning direction versus wire connections (reverse wires = reverse direction)
- Fan type (two types in the EUDAX kit) versus car speed
- Car performance with fan pushing versus pulling
- Car straight line travel versus direction fan is pointing (fan mount pivots on mounting post)
- Car speed using short motor mounting post versus longer post
Construction Tips
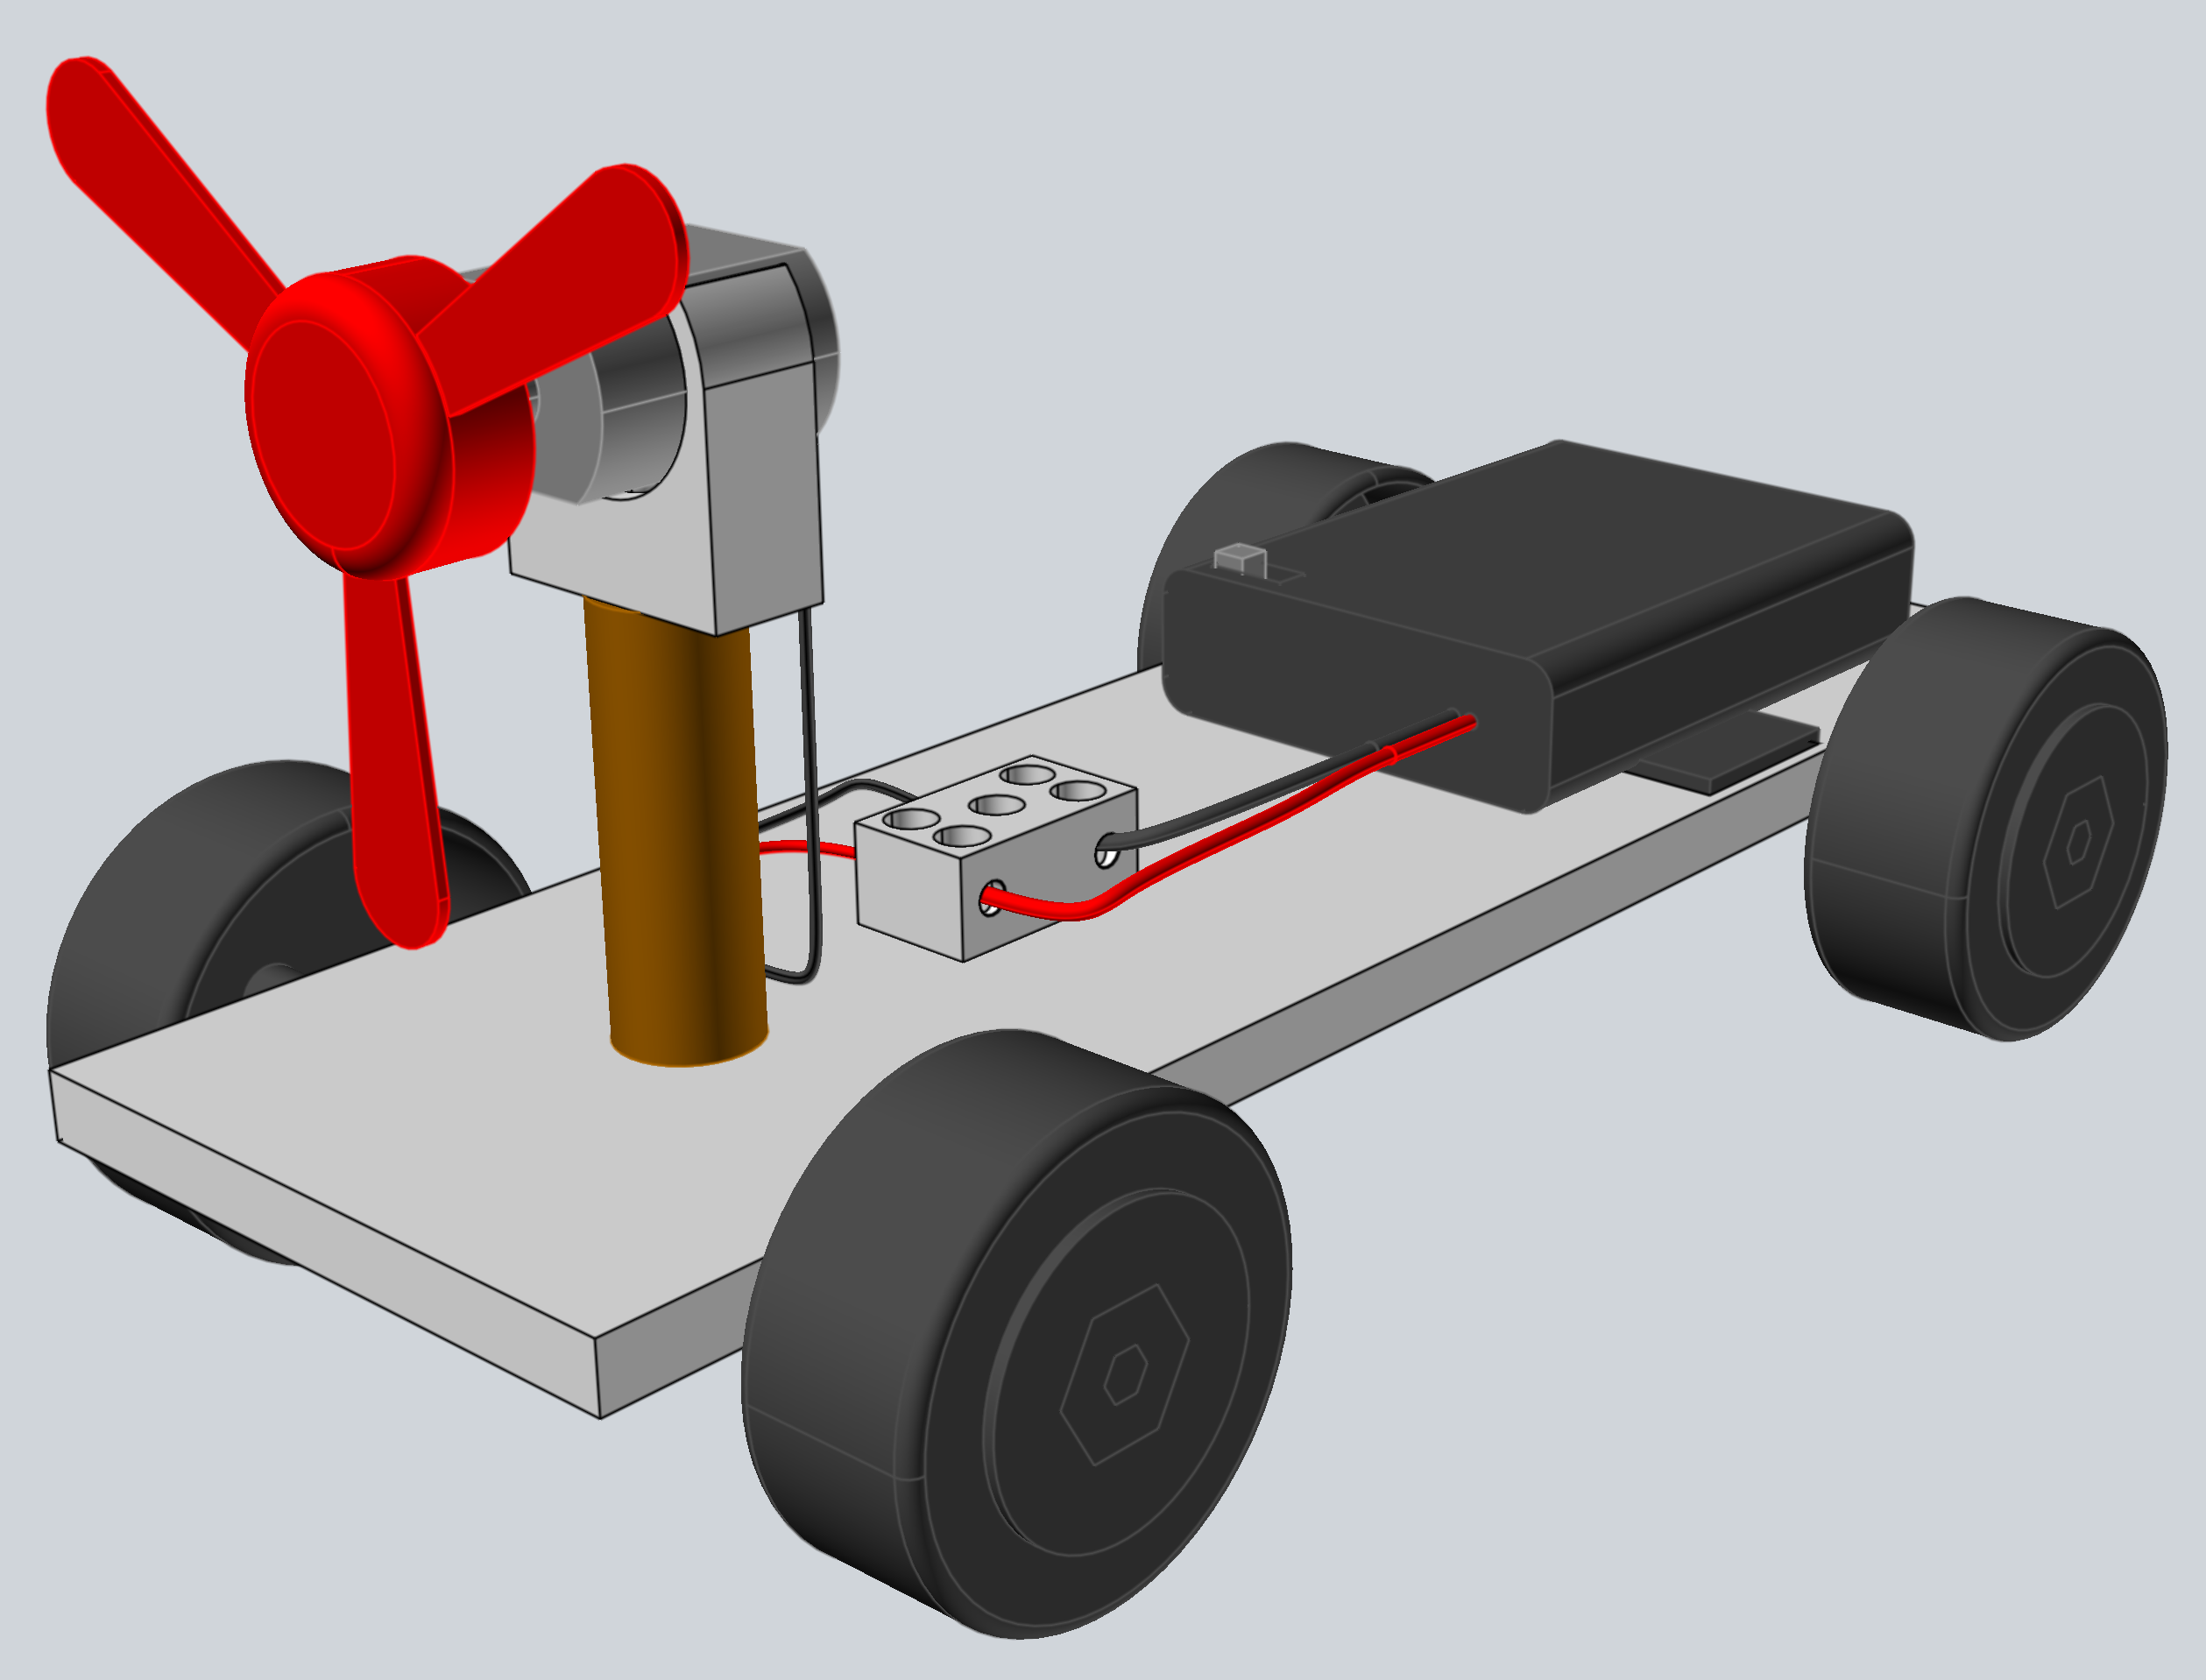
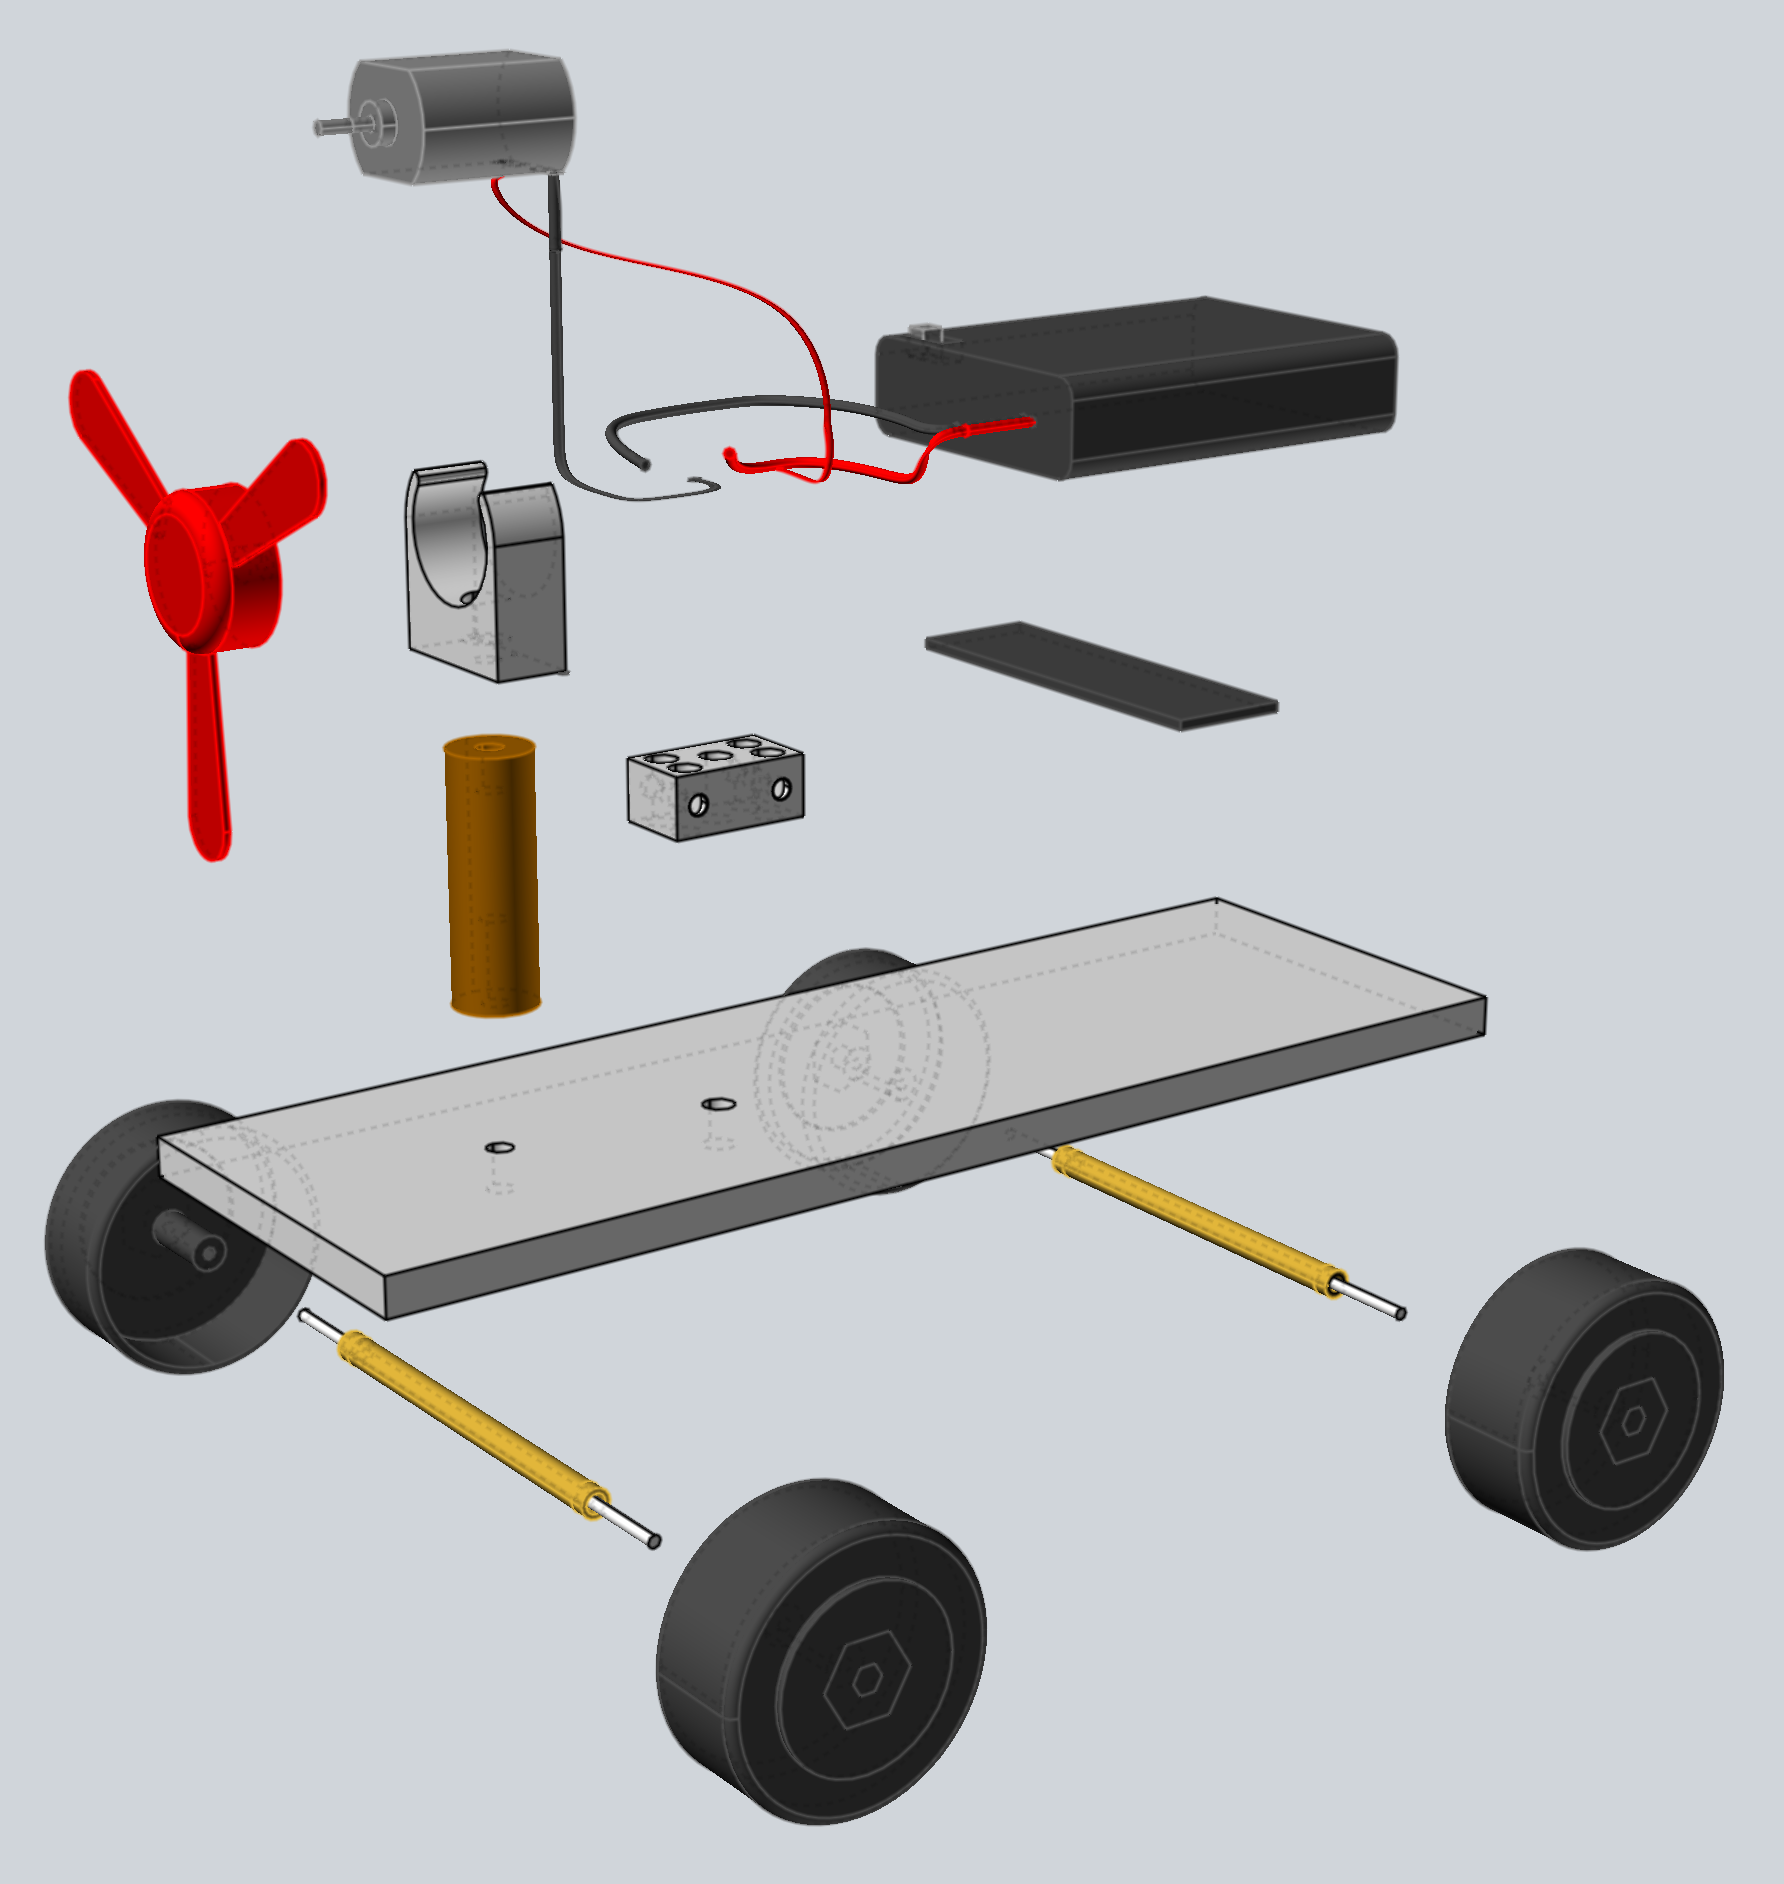
I’ve included these construction tips, images, and downloadable 3D CAD models (.skp file and .stp file as one zipped file) for your use. This project is really fun for the kids and easy to make.
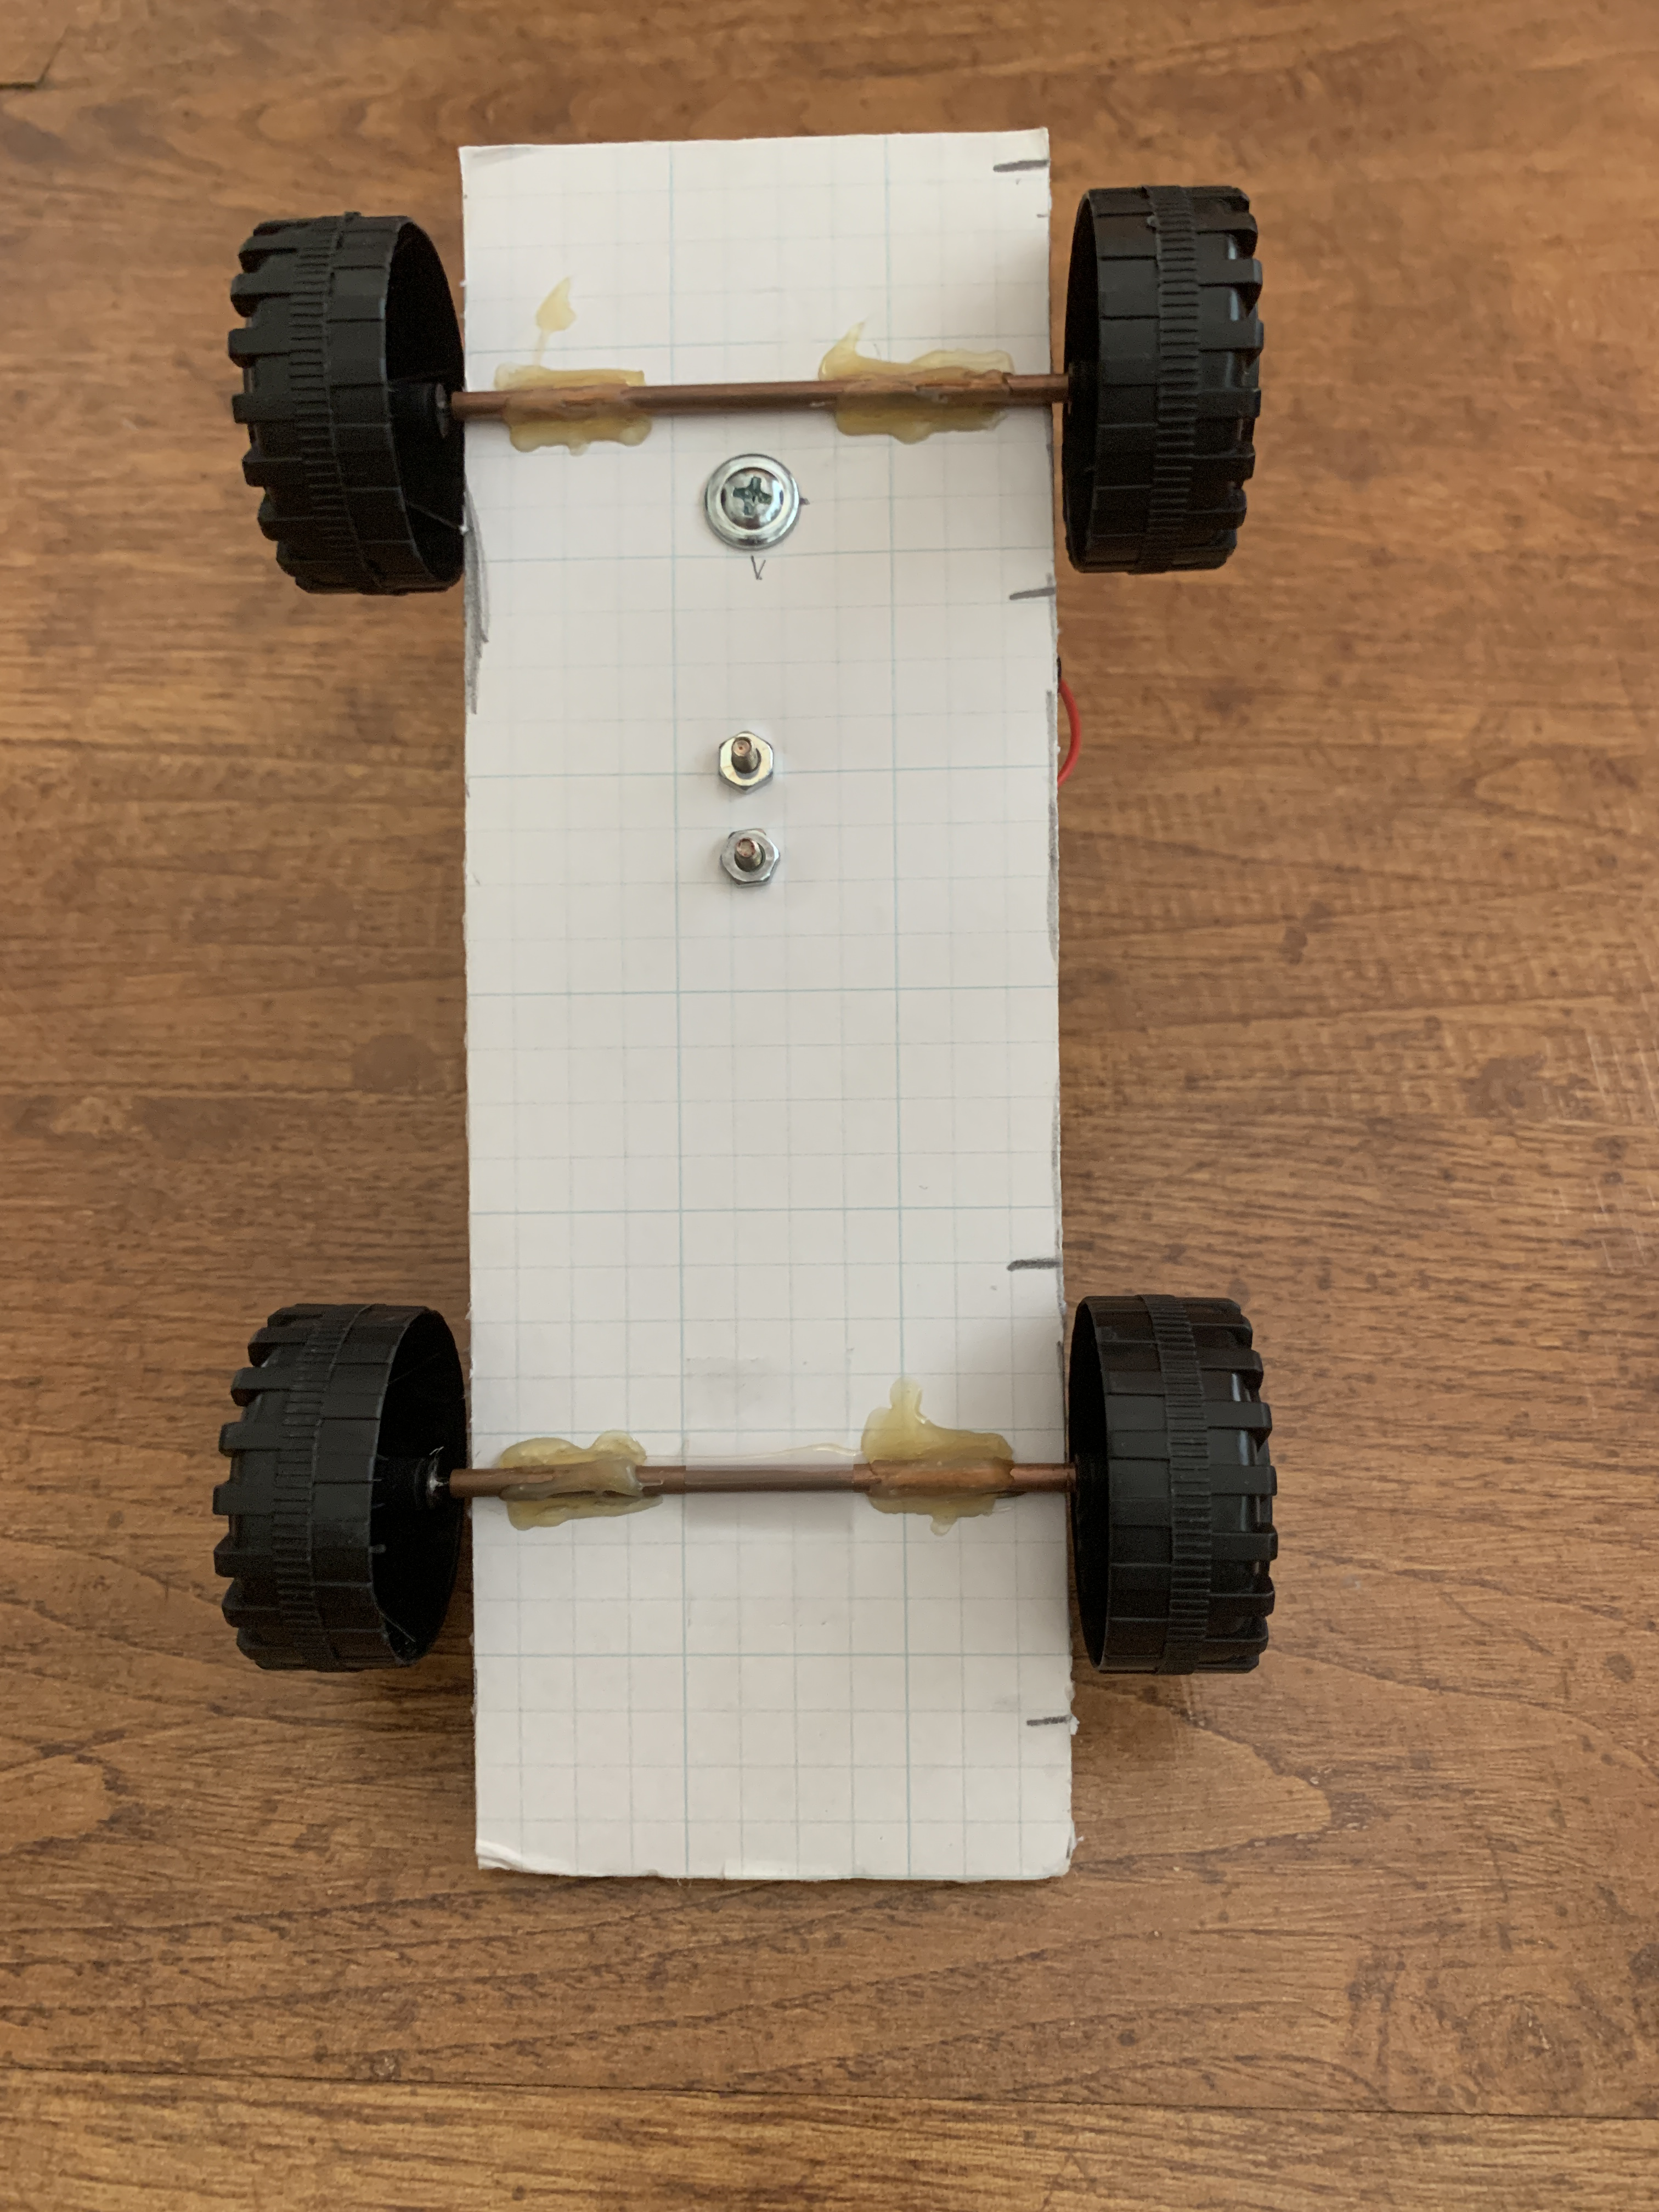
I prepared all of the parts and put them into a bag before engaging my grandkids. I really wanted them to have fun while experimenting with car and not getting bored with parts fabrication. So I pre-made the motor mounting post; soldered wires to the motor terminals; and cut the axle bearings (1/8″ OD metal tubing) to the correct length. I did require them to measure, mark, and cut out the foam board chassis. Yes… another learning opportunity.
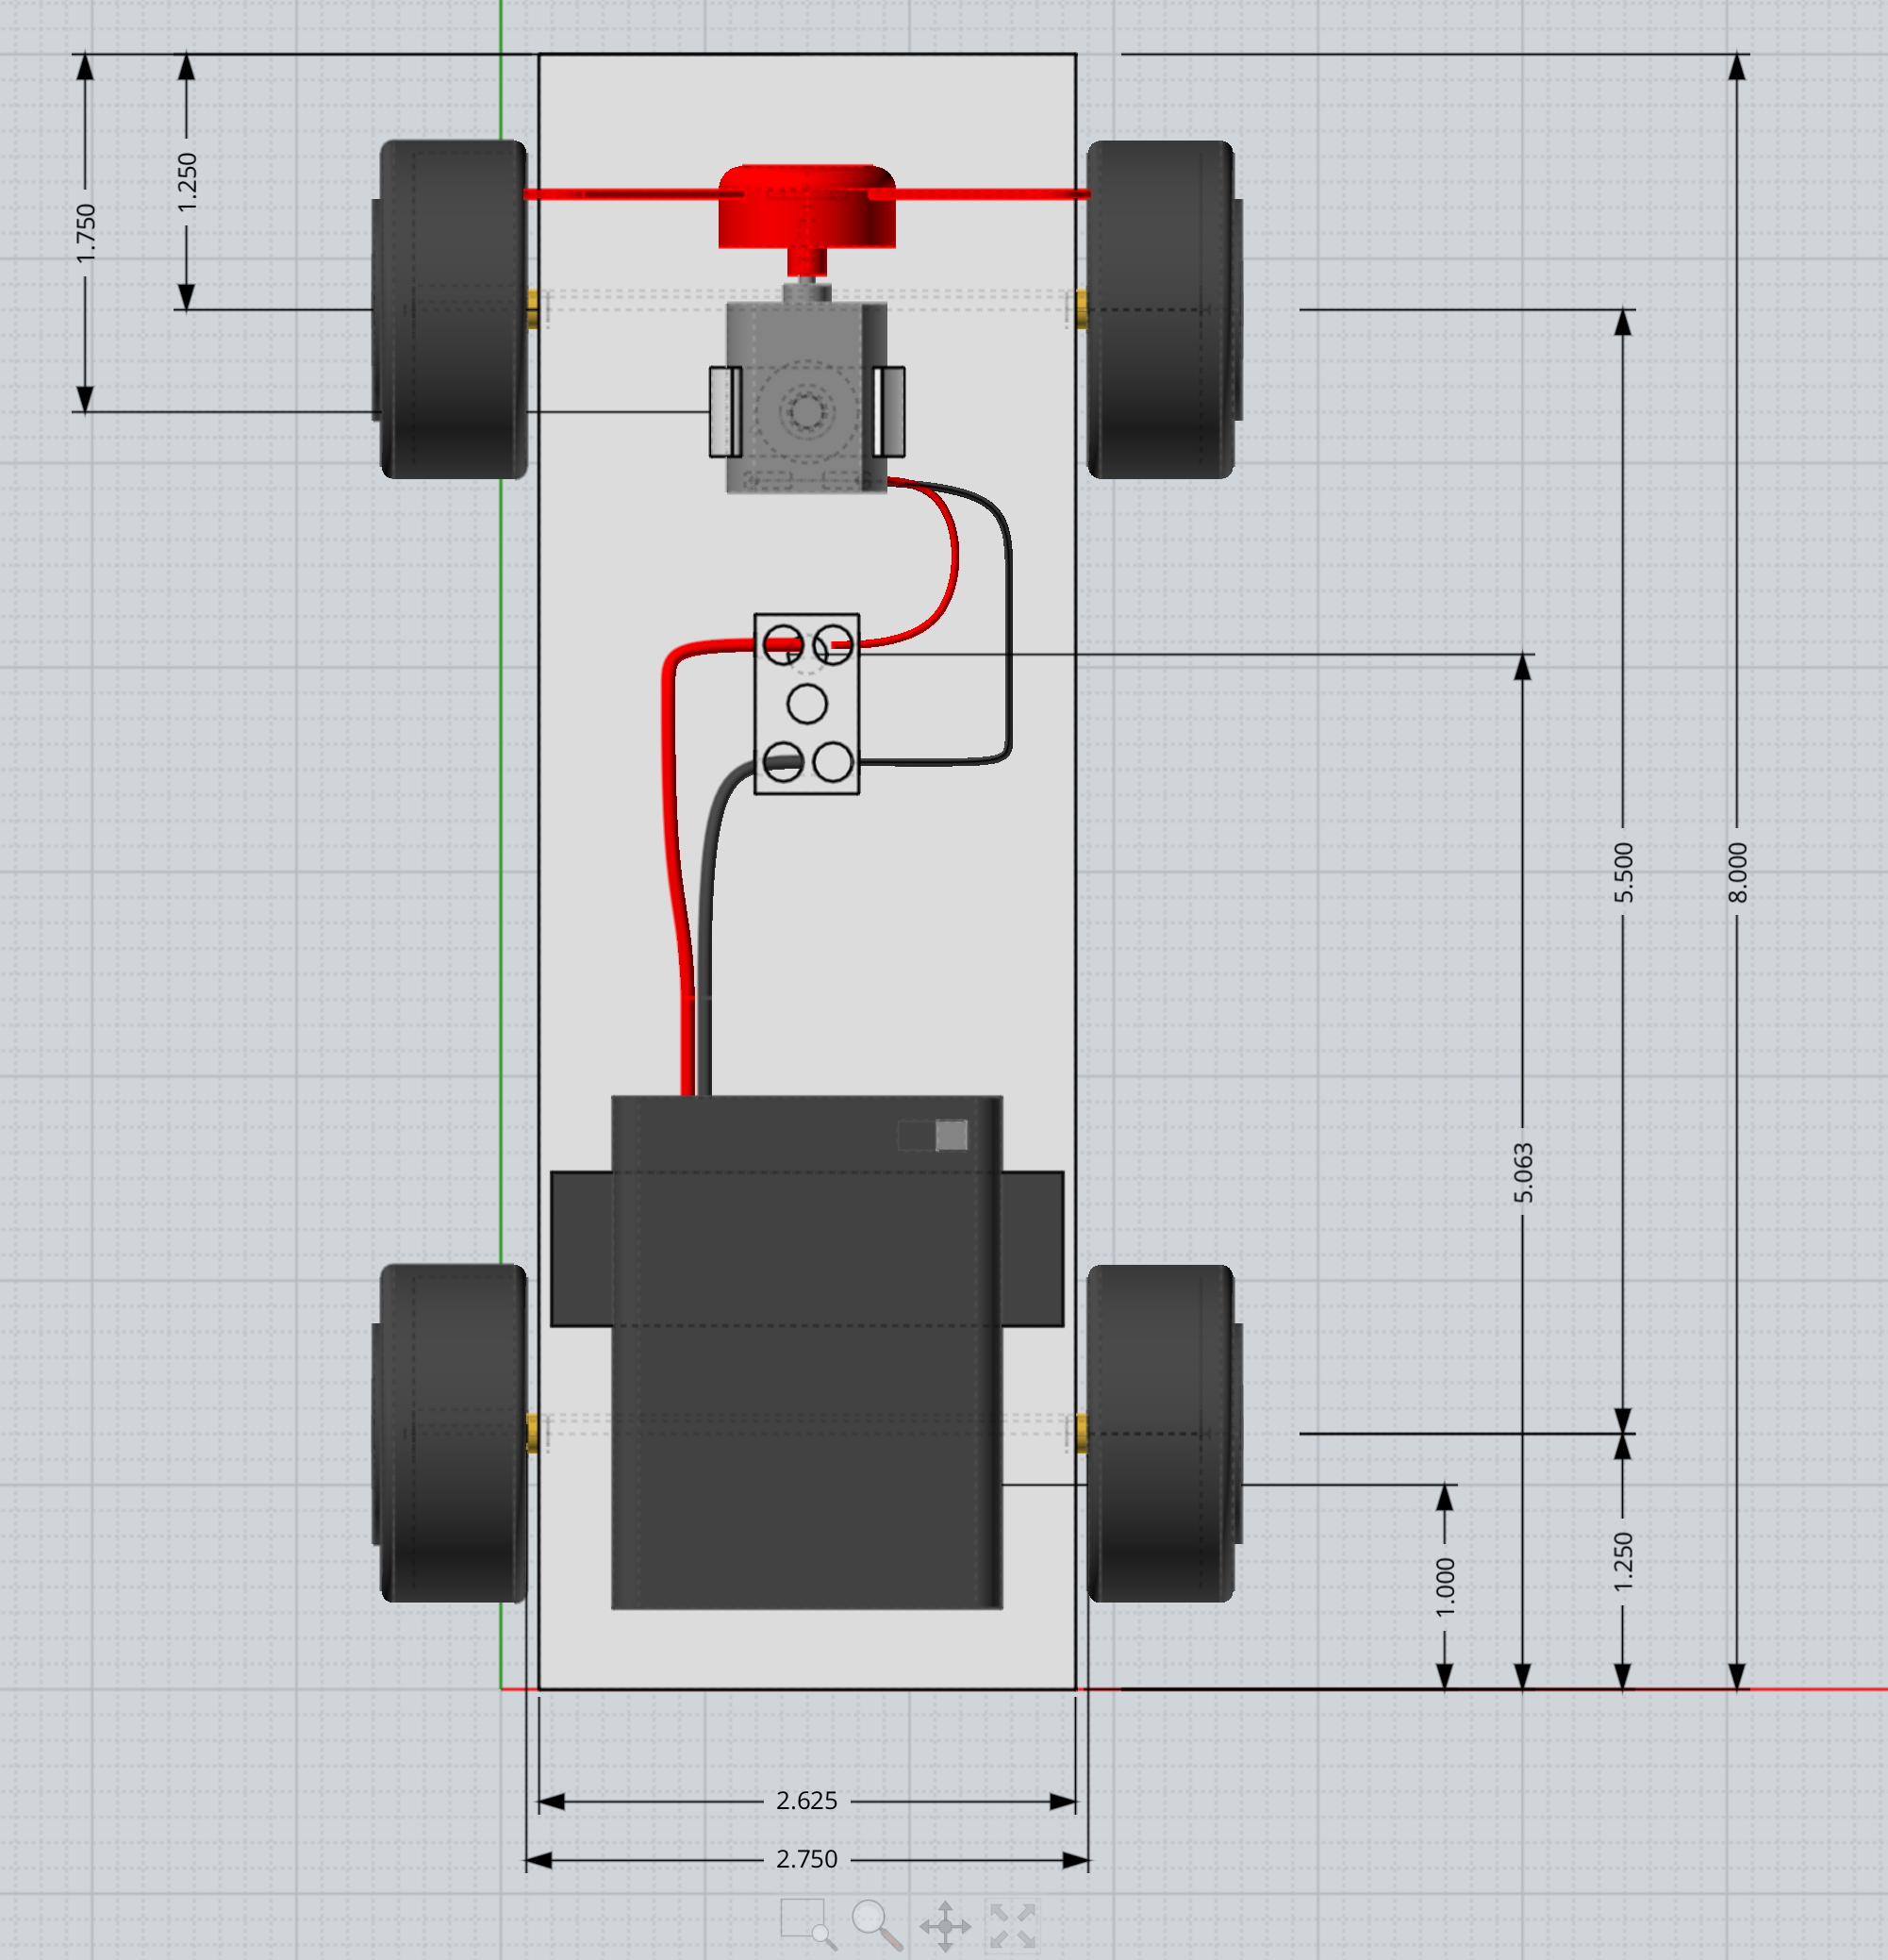
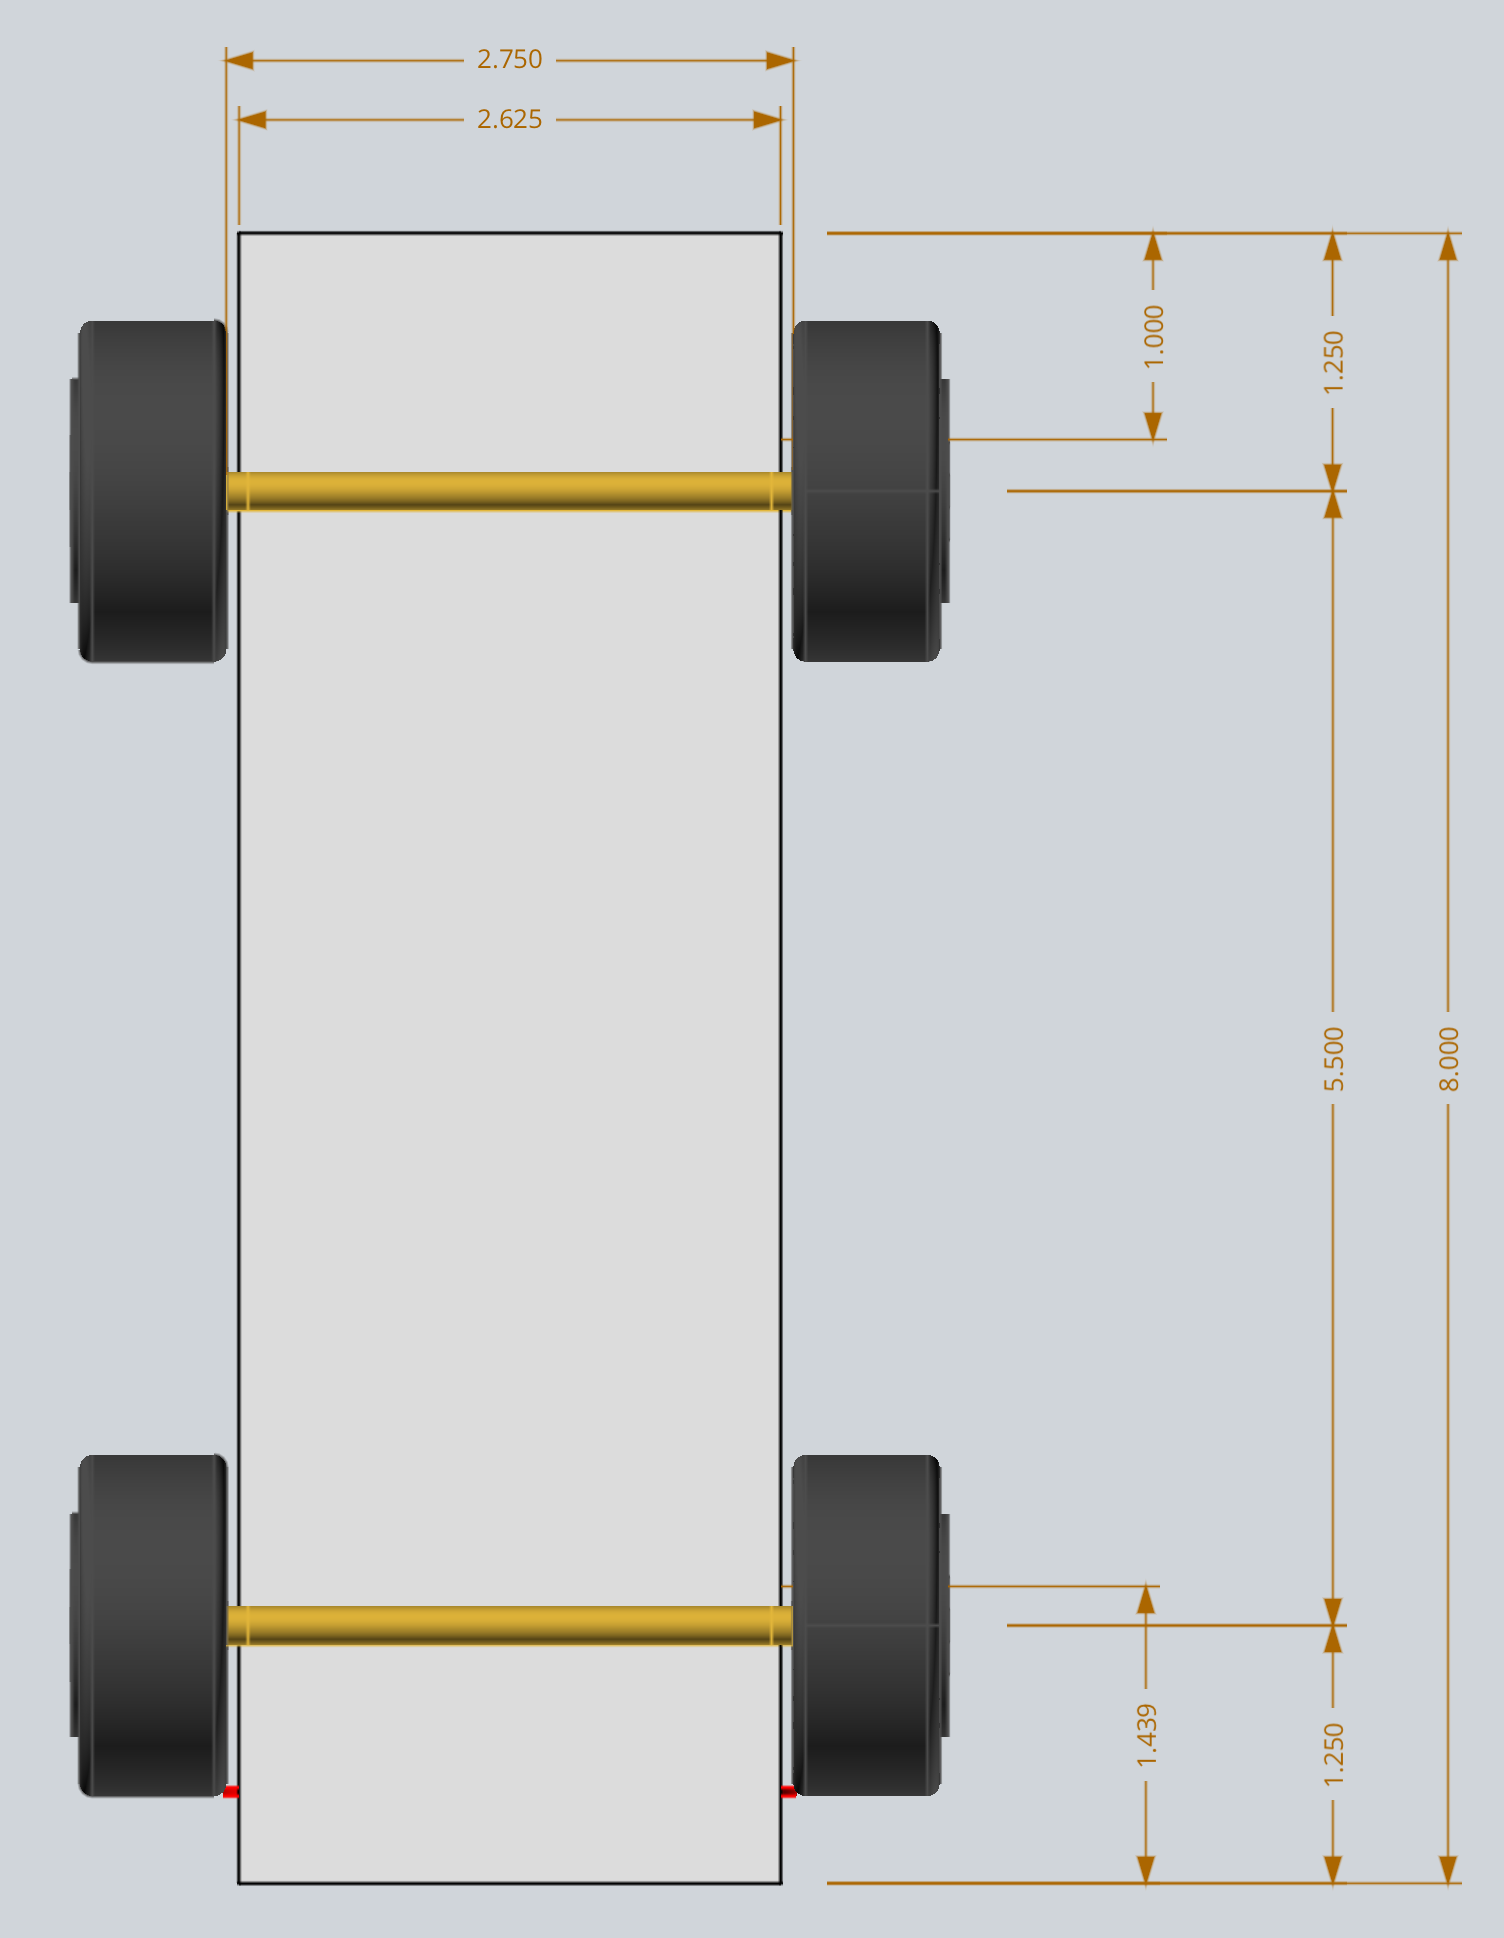
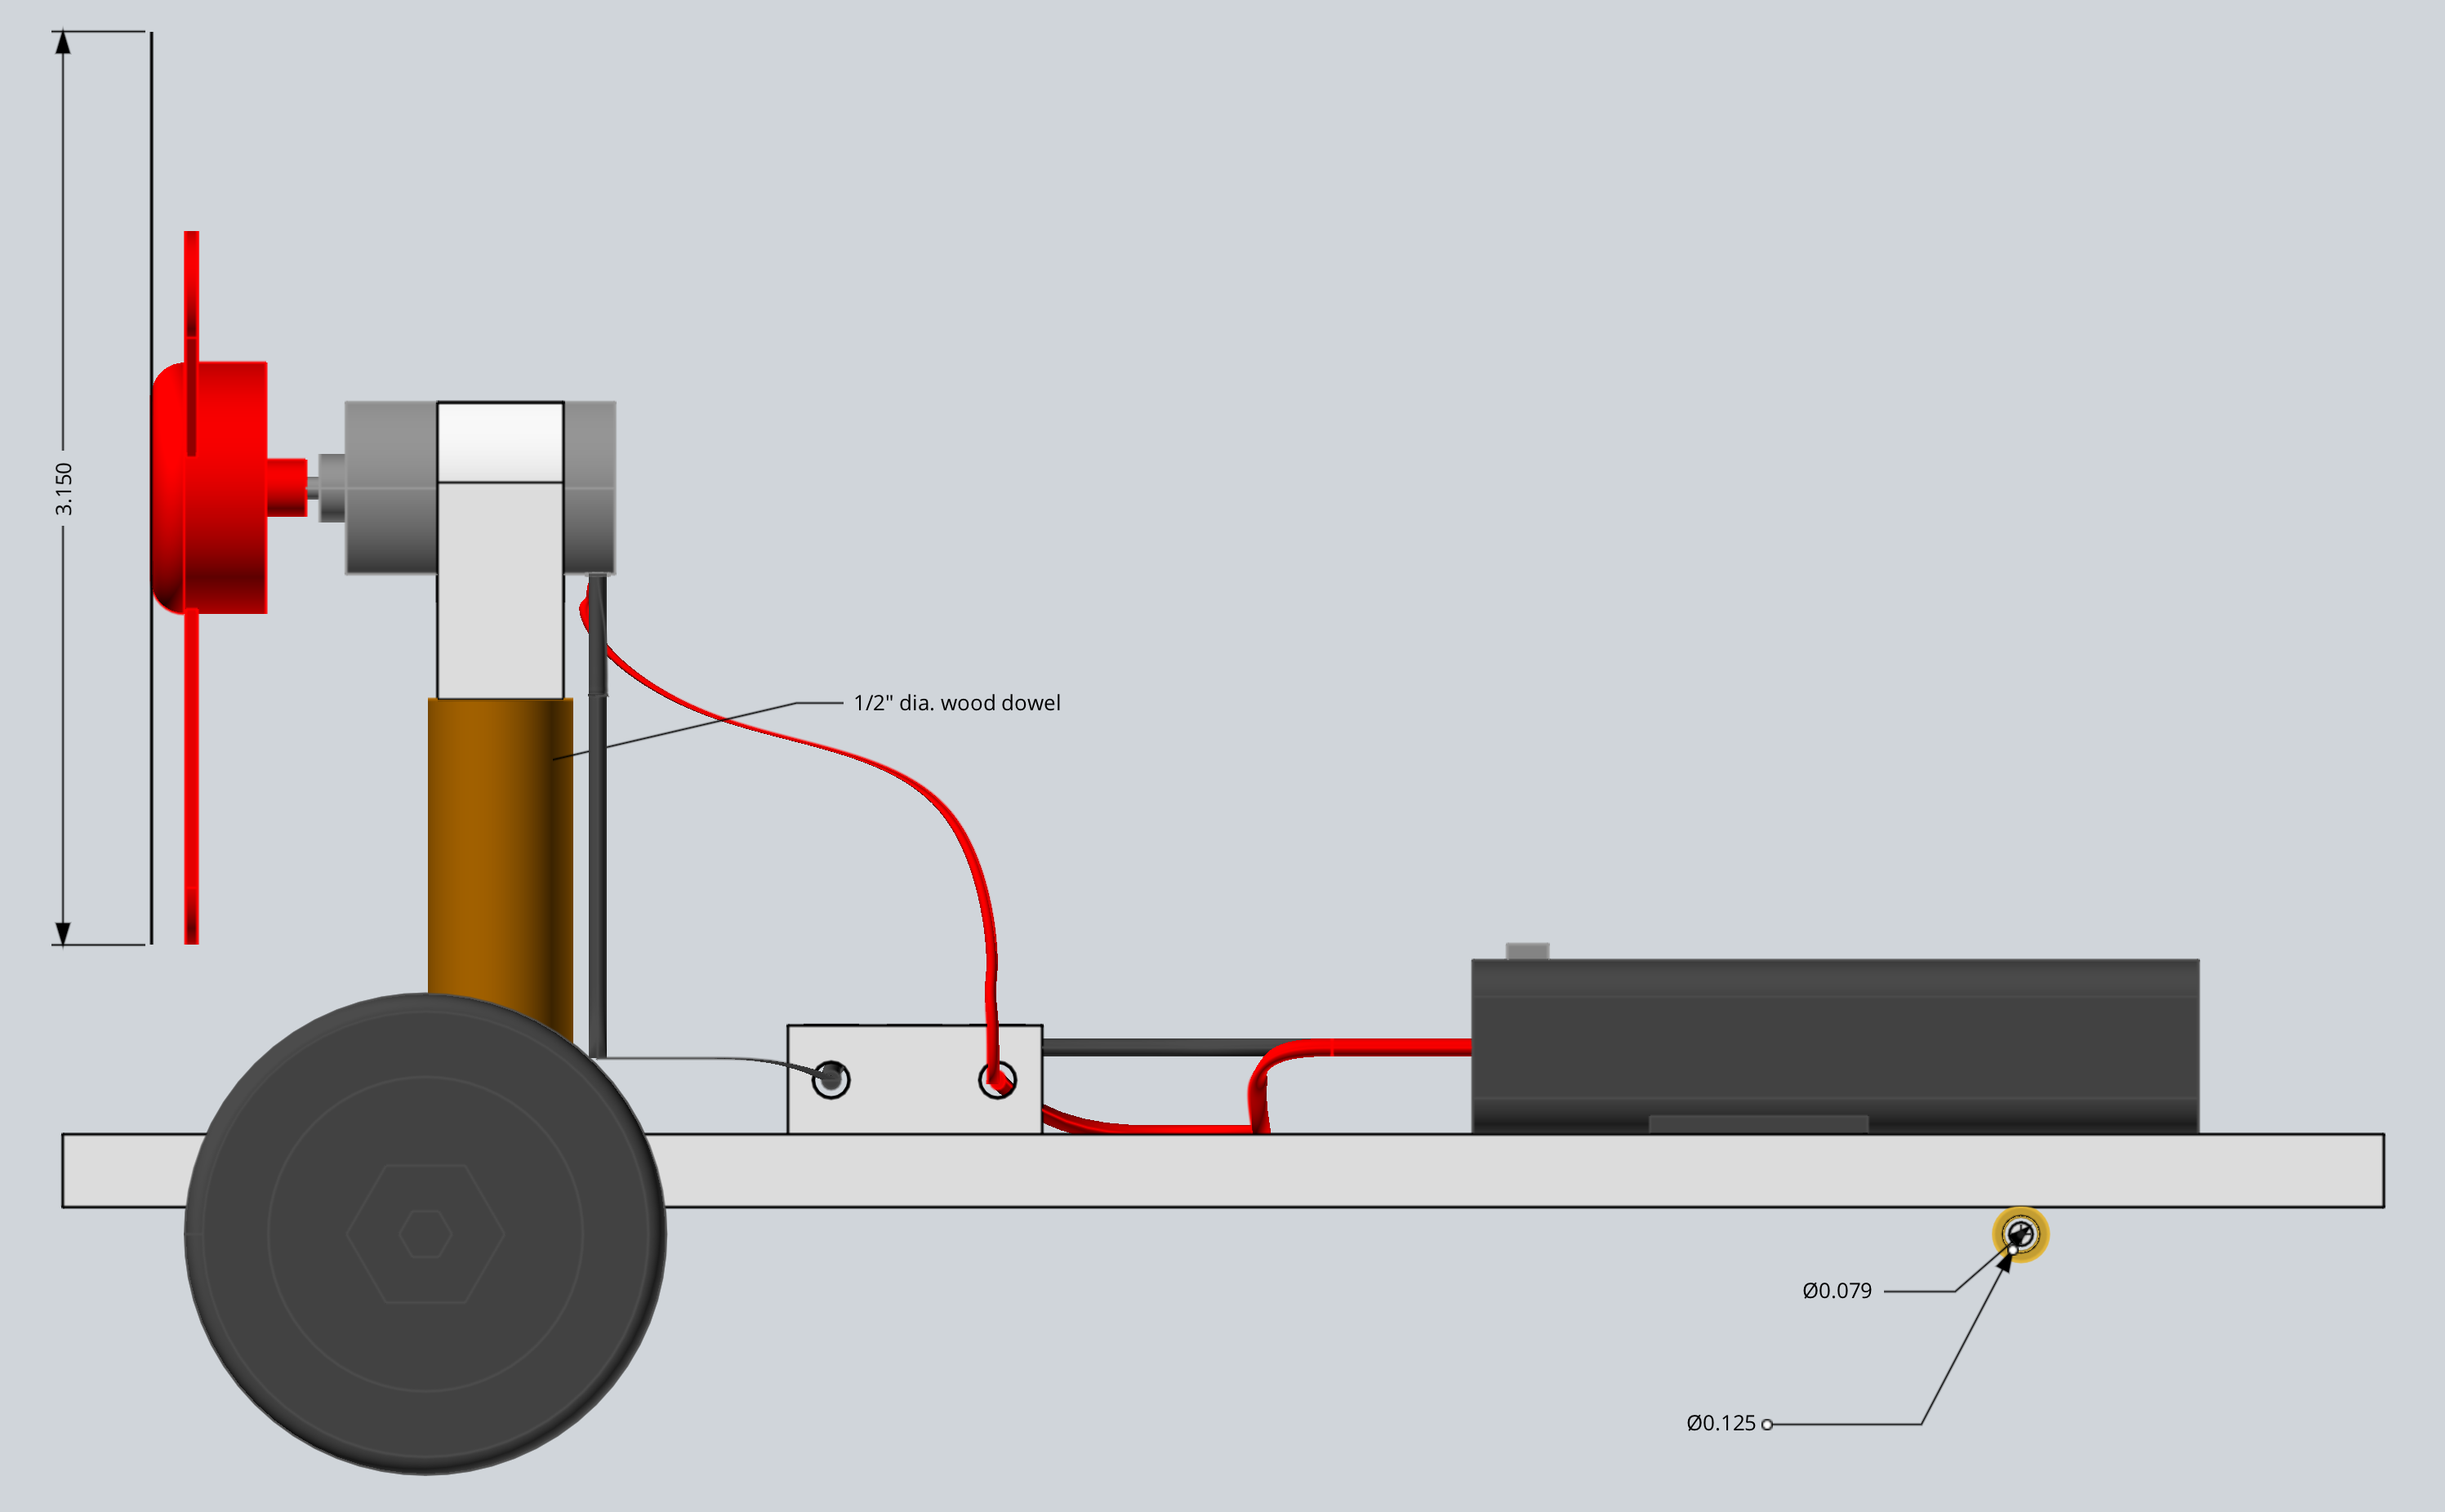
1/4″ thick foam board was used for the chassis. I chose a width of 2 5/8″ so the .08″ diameter (2mm) x 4″ long axles wouldn’t need cut to the correct length. The 1/8″ tubes were cut to 2 3/4″ length to provide a small gap between the plastic wheels and the foam board chassis. These details are depicted in the images and are available in the 3D CAD models.
Tip… I already had the 1/8″ tubes which work great. But I had considered using some small metal washers for bearings. Just align and hot glue some foam board mounting pads and small metal washers to each side of the chassis.
I did substitute my own switched battery case which holds up to 4 AAA batteries. The EUDAX battery case only held 2 batteries. I wanted the flexibility to change the number of batteries so the grandkids could experiment with the fan speed versus number of batteries. I simply replaced a battery with a 8-32 screw plus nut to vary the number of batteries in the case. I also use hook-and-loop tape (Velcro) to attach the battery case to the foam board chassis. This setup allowed easy removal and repositioning of the battery case.
Assembly was really easy for the grandchildren since I had already soldered the motor wires and predrilled the motor mounting post. I did watch closely to ensure they had the axles centered and parallel and I also helped with the hot glue gun.
Tip… Hit the easy button! Assemble the entire project using a hot glue gun which should hold together long enough for experimenting. Just make sure your wires are making good connections before hot gluing.
Here are the steps we used to assemble our car:
- Measure and cut out the 1/4″ thick foam board chassis
- Hot glue the axle ‘bearing’ tubes onto the chassis bottom
- Push one wheel onto each axle and slid the axle through the tube
- Push the second wheel onto each axle allowing a slight gap between the wheel and tube end
- Screw the motor mount to the wooden dowel
- Screw the motor mount to the chassis
- Select a fan and carefully pushed the fan onto the motor shaft
- Insert the motor into the motor mount
- Connect the motor wires to the battery pack. I used a terminal block, but any simple wire connection works.
- Insert the batteries and start the experimenting!